Layers, Clipping masks, Gradients and Blending
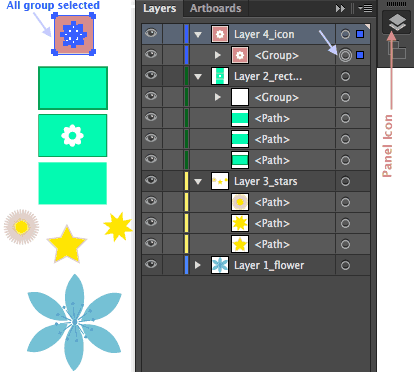
Building your artwork in Layers will make your work easy to access and modify.
Remember that each layer also keeps separate information about each group, path and object (as sub layers), so particular elements can be selected in a very easy way, by clicking in the icons on the right.
Please name layers: it helps you create the structure of the file and it is incredibly helpful for others. Make your co-workers glad to work with you.
Video tutorial: The Layers Panel from CC 2018 Esential training, HERE (long link)
Layers and Masking, HERE.
Web page: Some tips with layersHERE
Layers are covered in Chapter 8 of your book, p.248-266).
Gradients are covered at the beginning of Chapter 10 of your book (p.295-310)
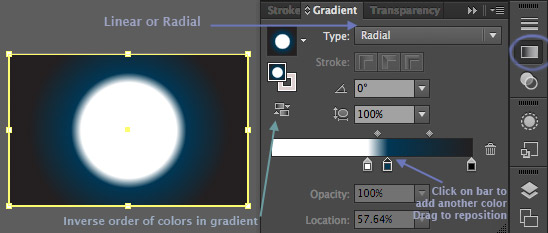 Make sure you cover how to create and apply a Linear Gradient (p.295-297)and a Radial gradient (p.302-306) It is also very important to know how to add Transparency to gradients. The Gradient tool in the tool bar is used to help release the Gradient Annotator bar over a gradient: use it to scale and reposition the gradient over the shape (p.309-310).
Video tutorial: From CC2018 Essential training: Working with gradient fills

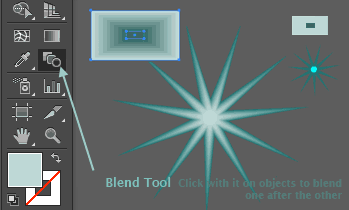 The Blend tool is also covered in chapter 10, pages 315-320. With it you can create a series of intermediate shapes and colors between two or more selected objects.
You can make a blend by selecting your objects and choose from the main menu:
Object< Blend< Make.
The shortcut is Command_Opt_B/Control_Alt_B
Using the blend tool to create intermediate shapes: HERE
Youtube: Aligning a blend across a path
(Object<Blend<Replace Spine)
Youtube: Creating a long shadow with a Blend (plus using a clipping mask)
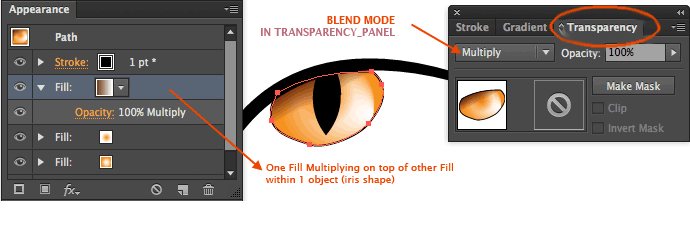
It is important that you don't confuse the Blend tool in Illustrator with Blending modes, which are different ways of visually blending content (special formulas for Transparency/opacity) and are used in all Adobe software (Photoshop, After Effects, Flash...). If you want to apply Blending modes, you will find them in the Transparency Panel. Select one mode with the object selected.
Notice that you can also create a mask using the button in the Transparency panel.

Clipping masks & Drawing modes
To work with Clipping masks you need to fully understand how to work with layers.
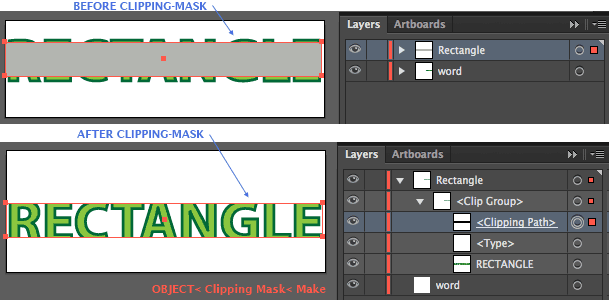
The easiest way is to create 2 layers: On top the one defining the area and shape of the mask (like a cookie cutter). Underneath the one containing the artwork to be masked (the Fill or cookie dough). Select both,go to OBJECT< Clipping mask<Make.
Clipping masks are covered in Chapter 8 of your book, (p.259-260).
Video tutorial: CC 2018, Clipping masks
You can see the before and after on the left.
Notice that when you apply the clipping mask, the
masked artwork becomes a sub-layer of the layer containing the mask, inside a "Clip group". Notice that the layer-names get a bit messed up. To release a mask go to OBJECT<Clipping mask<Release. Notice that the clipping shape will loose the stroke&Fill (see video above).
Applying a Clipping mask to a bitmap image in Illustrator is covered on page 435-439.
Video tutorial: CC 2020 Essential training, Clipping mask:
Cropping a bitmap with an Opacity Mask is placed right after in your book, p.440
Video tutorial: Cropping Images with Opacity masks, Adobe TV
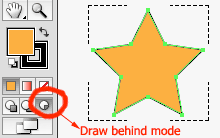
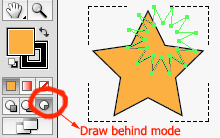
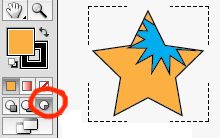
More info on the new Drawing modes on p.85 of your book (Draw Normal, Behind or Inside)
 |
 |
 |
||||
| Notice that the new drawing mode "Draw inside" (to the right side of "draw behind") allows you to create simple clipping masks on the fly. See down the page how actually this looks from the layers panel. |
||||||
