Basic drawing and Shape Tools.
Lesson from your book:
Basic Drawing-concepts in Illustrator. Covered in chapter 1
Make sure go have gone through the Workspace (p.37), the Tools panel (p.38-40), the Control panel (p.41), changing the view of artwork (p.48-51).
Artboards are different canvases inside a document. They have important uses: showing alternative looks of an artwork, organizing different elements of a project and they can even be exported as individual elements from Illustrator to other programs.
Find information about them on p. 14, 86 and 123-125. Look also at Rulers and guides (p.125)
Video Tutorial: Creating multi artboard documents (Illustrator CC 2015)Now under "More settings".
Video Tutorial: Adding an artboard to a document with the artboard tool (Illustrator CC 2015)
Video Tutorial: Creating a new Document with More settings, "Illustrator CC 2019, One-on one fundamentals"
Video Tutorial: Working with MultiArtboard Documents, "Illustrator CC 2019, Essential training"
Shapes. Covered in chapter 3 of your book.
The shape icon looks like a rectangle the first time you open the program, later on it will display the last primitive shape you used.
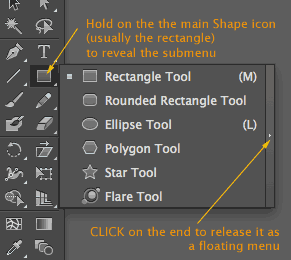
 Play with all primitive shapes, using the Control panel to modify and control each shape. My advice is that you work with the Floating menu, to have all shapes available (picture).
Video Tutorial: Working with shapes, Adobe help
From the book, make sure you go through: Working with basic shapes (p 84-94)
Drawing modes: Drawing Normal, behind and Inside a shape (p.85), Smart guides (p.91),
document grid (p.88), and changing the strokes width and alignment (p.94).
Line segments (p.95), Joining paths (p.97), using the width tool (p. 98-100)
You can practice with Combining and Editing shapes (Shape builder and pathfinder tools) but they will be fully covered on module 6.
Basic Drawing. Corner points and Bezier points.
If you want to draw already or work with more sophisticated shapes, you should be familiar with Achor points. An Achor point represents the location of a point with a tiny square. The tiny icon looks hollow/white when it is not selected and filled/black when selected.
Beginners should work first with straight shapes, that use Corner points.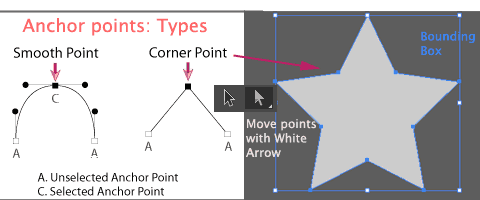
To define a curve with Vector Graphics we use a special type of point, called Bezier. In a Bezier point the anchor point defines the exact location, and the handle, ended in a direction point, defines the tension-curve to the next anchor point. Each anchor point has 2 handles, looking a bit like "antennas" on an old TV set.
Video tutorial: Understanding vector paths
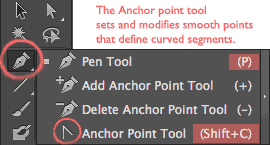 To set the curve of the point, o transform a corner point into a
 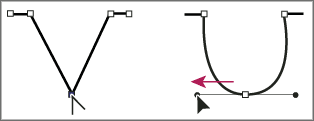 smooth or Bezier point, you will use the Anchor point tool inside the Pen tool.
We will work more with the pen tool in the module 3 of this class.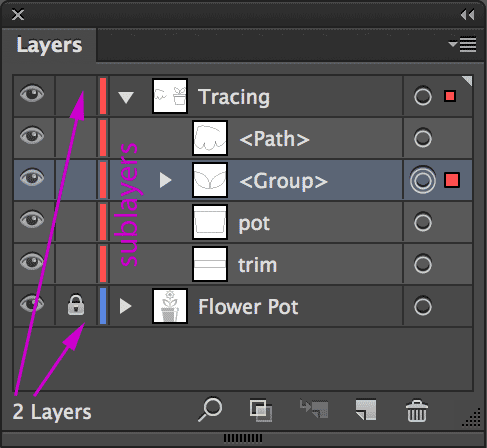 Layers. If you are not an absolute beginner in the program, or you feel confident about the content of this module, it would be a good idea to begin using Layers from this early on.
Layers are covered in depth on chapter 8 of your book. Please look at the graph below so you can begin using them now.
If you think about what layer to use before you draw, working with Illustrator, editing, sharing and reusing your work will be MUCH easier.
Video tutorial: Understanding stacking order in illustrator
Video tutorial: Understanding layers and stacking order in illustrator, Adobe TV

