Orientation and Basics
Welcome to the first module in this class.
You should send me an email through Canvas AFTER you read the syllabus stating that you have understood it. Make sure that you practice with the tools in Canvas: What are Discussions, assignments, the content pages, how to send an email to the instructor... please spend some time in the home page getting familiar with the elements in it.
On every lesson you will find instructions to chapters and pages to cover in your book. Please follow the lesson by practicing with Illustrator on the side. Take notes on a note pad, specially shortcuts or locations of important menu items. The exact page reference refers to the first CC book, the other books hav almost the same content, a couple of pages off.
Watch all the free videos. If the module has links to tutorials, complete several of them. Take notes on important tips, shortcuts or techniques and keep them by your side when you work. Revise your notes in between working-sessions. At the beginning of learning a new software most of your effort resides in brute memorization. Then habit will kick in.
Lesson from your book:
In chapter 1, How to set-up Illustrator/ getting to know the work area.
Make sure you cover: Getting started, Exploring the workspace (p.34-35), the Tool bar, Working with the Properties Panel and the panels (p.38-42). Resetting and Saving your workspace (p.43-44), Using the Panel and Context menus (p.45), Using the zoom tool (p.48), Panning & scrolling through a document(p.50).
Linkedin lerning, Touring the Interface, HERE (long link)
How to navigate a document, HERE
Adobe TV Video-tutorial: How to create a new document in Illustrator, Adobe Help
In chapter 2, Selecting and Aligning.
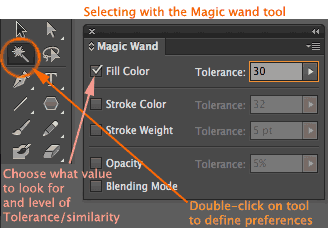
![]() If you are an absolute beginner, focus on how to select artwork with the black or the white arrow in your Tool panel.
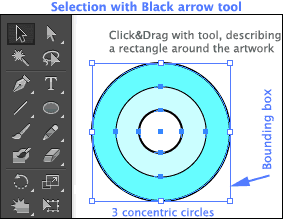
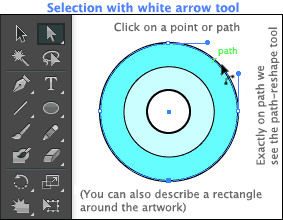
The black arrow (remember the key V as a shortcut) will select complete objects showing its bounding box. The white arrow (shortcut-key A) is more specific: it will select paths within a shape and display the anchor-points in it: You can then use it to modify the position of the points.
If you are an absolute beginner, focus on how to select artwork with the black or the white arrow in your Tool panel.
The black arrow (remember the key V as a shortcut) will select complete objects showing its bounding box. The white arrow (shortcut-key A) is more specific: it will select paths within a shape and display the anchor-points in it: You can then use it to modify the position of the points.
Choosing the same artwork with the Black or white selection tool will let you see different elements of it.
Video tutorial: Selection tools
Video tutorial: Drawing basic shapes
Video Tutorial: Zoom in and Out of the dcument
Video Tutorial: Understanding Path versus Appeareance

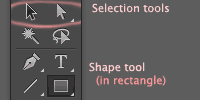 With the different Shape tools (in the Tools panel) you can create basic shapes. Tools with a tiny triangle on the right-lower corner contain a sub-tool menu. Hold on the icon to reveal it.
With the Fill and Stoke tools (towards the bottom of the Tools panel) you can control the fill and Outline color of your shapes.
Adobe-TV video Tutorial: How to apply color, Adobe help. using Fill and stroke colors.
Step Tutorial: Working with shapes, Adobe help
Video tutorial: Using the pencil tool to draw freehand.
Remember that if you don't close the lines (coming back to the starting point, you will not be able to fill them with color.
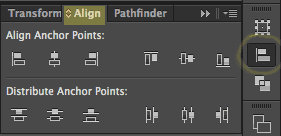 Aligning and distributing objects are very important skills to create good artwork, reference it on p.71-73. Check the Align panel and remember the icon for it in the Side Panel column (when working with the Essentials Classic workspace).
You will have to check on Grouping several times for the next 3 modules. grouping and working in isolation mode inside a group are placed around p.75-77.
To group a number of objects, select them all (by clicking on them successively holding the SHIFT key, then type Command/Control_G.
Vector versus raster/bitmaps. It is important that you understand the difference between vector-graphic images or elements and raster/bitmap images. Adobe programs by now support both types of graphics in their files but you should think of Adobe Photoshop as a native bitmap program that can use vector-graphic elements (Shapes, masks,the pen tool, type...) and Adobe Illustrator as a native vector-based program that can incorporate bitmap elements (photo images or artwork from Photoshop, JPEGs, GIFs, PNGs).
Adobe Flash is an animation/multimedia program that also uses vector-graphics as a native format. We will talk more about it at the end of this course, on module 15.

