This week we will be looking at type in Photoshop. Unlike type in a word processing program, text in Photoshop starts as a vector-based outline that defines the symbols in a typeface. When you add text using the Type tool, Photoshop creates a text layer that contains the vector-based outline. As soon as you commit the text by clicking the commit button, selecting another layer or selecting a different tool, Photoshop fills the outline with pixels. The text layer retains the vector outline along with the pixels. As long as the text layer is preserved, the vector will be preserved. As soon as you flatten the image, you lose the vector outline and are left with only the text in pixels. So what? Well, with a text layer, you have the ability to resize, add effects and styles, or transform its shape. You can do all of this and still have crisp, resolution-independent text. Get rid of the text layer and you lose all of this functionality.
You are already familiar with the text tool. You know how to change options like typeface, size, justification, and color in the options tool bar. Now that we know what a text layer is composed of, lets talk about how to edit the text layer after we have added and committed some text. The first thing I want to talk about is the cursor. When the text tool is selected, the cursor looks like this:
![]()
Once you click on your document, Photoshop creates a new layer. Notice the dotted box around this cursor, remember what this looks like. Whenever you see the dotted box around the cursor and you click in your document, a new layer will be created. It doesn't matter how close the cursor is to the text in an existing text layer or even if the cursor is on the text in that layer.
If you want to select the text in an existing layer, you need to either double click the text layer thumbnail, here:

or with the text tool selected, drag to select the text. If you drag to select the text, your cursor must look like this:
![]()
Once selected, your text will look like this:

and you may now edit the text.
You can create a selection from the vector-based outline of text in a text layer by holding down the Crtl (pc) or Cmd (mac) key and clicking the layer thumbnail. You will now get the dancing ants around your text, like this:
![]()
This selection can then be used like any other selection. You can use it to copy or cut pixels from a layer, to protect or mask part of a layer, or it can be copied to another document.
If you want your text to fit into a specific area on your document, use the text tool to draw a box the size of the area where you want the text to go, like this:
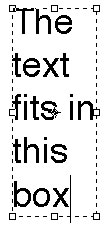
You can copy and paste text into this box. In addition, if you put your cursor over the corner handles, you will get the curved-double arrow which will allow you to rotate the text box.
Lastly, let's talk about creating a clipping mask with text. Let's say you want to fill your text with a gradient or an image. If you create a selection and copy and paste the pixels into the outline, you will have a resolution-dependent layer that you cannot resize or alter with out changing the quality of the text. On the other hand, if you use a clipping mask, your text will still be resolution-independent and you can then alter the text to your heart's content without a loss of quality. A clipping mask is like any other mask, it masks off part of the image and leaves the other part of the image unmasked. The unmasked part is visible and can be altered, while the masked part is protected and is obscured. Since, part of the text layer is a vector outline, we can create a clipping mask out of it (this can be done with any vector shape). The clipping mask then clips the pixels in the layer we select as the fill layer. This layer can contain an image, a gradient, paint strokes, anything that contains pixels. To create the clipping mask, Alt (pc) or Option (mac) click in between the text layer and the fill layer (the fill layer must be on top of the text layer). A small down arrow appears in the fill layer indicating that it is clipped. You can now move the fill layer using the move tool and get the pixels exactly where you want them.