WEB AUTHORING. MAT 108

Alejandra Jarabo
Media Arts & Technologies Division.sbcc

THE PERFECT SELECTION PROCESS


When you are planning Graphics for the web is important to think in terms of "information design".
Photographs capture moments in time and space, and sometimes can be more distracting than anything else.

Digital retouching allows you to isolate exactly the character or section in a photograph that is really important for your story,
and then eliminate or reconstruct the environment for that image (by eliminating or reconstructing the background)
This way you can achieve seamless graphics on your page (there is no visible rectangle delimiting your image) and informational graphics that go exactly to the point.

In this page I am going to follow the working routine in order to isolate a Clean selection of your image, and get it to a new layer or a new document by itself.

You want to follow this process when you are preparing an image for a transparent GIF or a PNG.
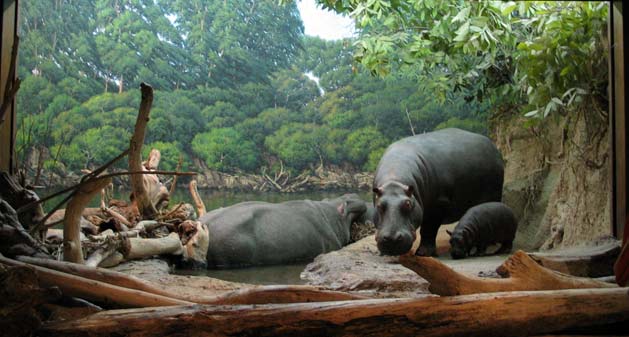
 

This is my beautiful digital picture

I want to take the hippos out of that window
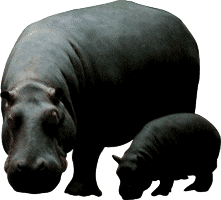
 

Those are the Hippos

"out of contest"

(saved in a"transparent GIF format)

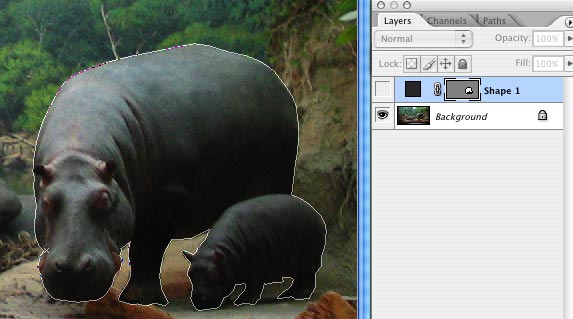
The shape has been isolated and saved on a new layer
That layer has been saved as a GIF with the background set to transparent

 
The Hippos used as a design-element on a web-page


THE PROCESS TO OBTAIN A PERFECT SELECTION_EXPLAINED HERE:


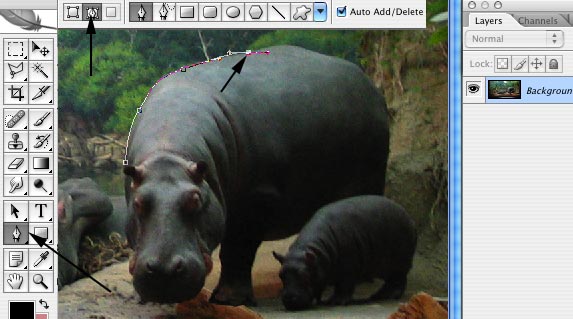
Use the pen tool to draw around your character a perfect VECTOR PATH.

This path gets saved in your photoshop file and can be used later for making further selections.
This is method produces perfect silouhettes or cut-outs that can be used containing the original image, a flat color, agradient or a pattern.


Make sure you are deactivating the color fill for the path or you will not see where you are clicking points very soon
(Upper-bar, select "vector square with little pen on top" icon)

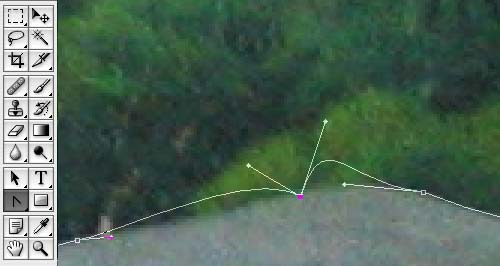
Those points are called Bezier points, each one has a couple of antenas that later on would help you adjust the "tension" or curve between points.

Click where you want a point and "turn" for curve tension before you release the mouse. Then immediatelly click for the next point. You will adjust the curves later!

Define your shape with minimum amount of points:begining and end of the curve, the curve gets defined by the "tension" indicated by the anthenas.


Layers:
Backgound layer


Modify curves:


When you have finished the perimeter
around your shape
you can change to anopther sub-option of the pen tool that looks like ">"
and retouch the curves by pulling or releasing from the anthenas.

The points needs to get selected in order to see their anthenas and the 2 adjacent ones.


You have completed and closed your path-shape.

Your vector shape
drawn with the pen tool is finished.

This is the UNSELECTED path.


To the next page on the perfect selection