![]()
Your process book is both a scrapbook and a journal that details the process by which you developed your designs and creative solutions. Note that your process book is an important document that illustrates your progress as a designer. A well-written, well-kept process book will assist you professionally and is a thorough resource to show and maintain your work.
What goes into a process book?
1. Research: Your research should show the sources for inspiration (URLs, publications, samples, etc.) for your project. These can be scanned or digitally captured for inclusion. You should also record your thoughts and words related to the creative beginnings of your project. (For example, if you were asked to design an ad for apples, the related wordlist might include red, fruit, tree, etc.) Even color combinations or test patches could be included in this section.
2. Thumbnails: These are 30-second drawings (by hand) that show your conversion of the research items into visual trials, moving toward a solution.
3. Roughs: At this point, you are adding detail to your
sketches. These are drawings that should each take 3 to
5 minutes to complete and include items such as
* Headline text renderings
* Body copy greeking (with font specs noted)
* Image renderings with notes about the image (such as
photo of apple) and color indications (color pencil or
notes written such as PMS 485 or CMYK)
4. Computer Roughs: This is the first stage of the design process that should be created (initially) on a computer. Rework your rough sketches on the computer. Include actual text for headline, body copy, etc. Include placed images for all graphics, and assign the appropriate colors to the design.
5. Analysis: Think about the solutions you created in stage four. As you examine each attempt, narrow your focus to the best solutions. Include the digital layouts from the analysis phase in your process book. Those files that "make the cut" will be examined more closely to determine the direction each will take. As you do this, include notations on the prints, images or in the PDF files that will be included with your process book. These notes will show your adjustments and improvements.
Repeat these steps until you have one final solution with no notations or need for further changes.
6. Final:This is it! When no more changes are needed and the design is complete, place the final solution in your process book as the last page. Remember that all stages should lead up to this page.
Reminder: You can go back to step one at any time and repeat the design process if a new concept is being explored.
Here is bit of food for thought regarding your process book. Keep in mind that each of you (both online and face-to-face students) will need to print/output your process books, bind them in some fashion, and then photograph the final printed book and add the photographed final presentation to your pdf submission. |
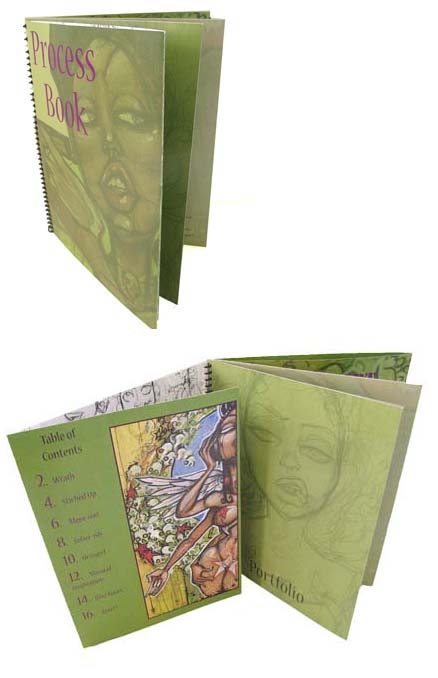
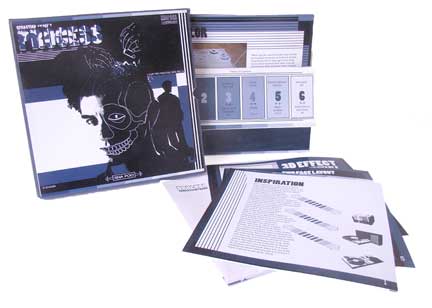
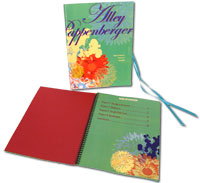
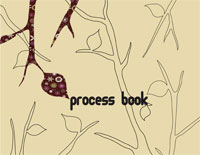
Sample Process Books — just click to view
(keep in mind that all of these are
coyrighted materials)


How
Your Process Book
wil be Evaluated