|
Image size for all images for
assignments:
72
ppi
600 pixels maximum (for vertical images)
800 pixels width (for horizontal images)
save as a jpeg file - be sure file name extension ends in .jpg
How
To Change Image Size for Assignment Image Uploads
Open the 'low' folder files you want to work with into Photoshop
(or image editing equivalent).
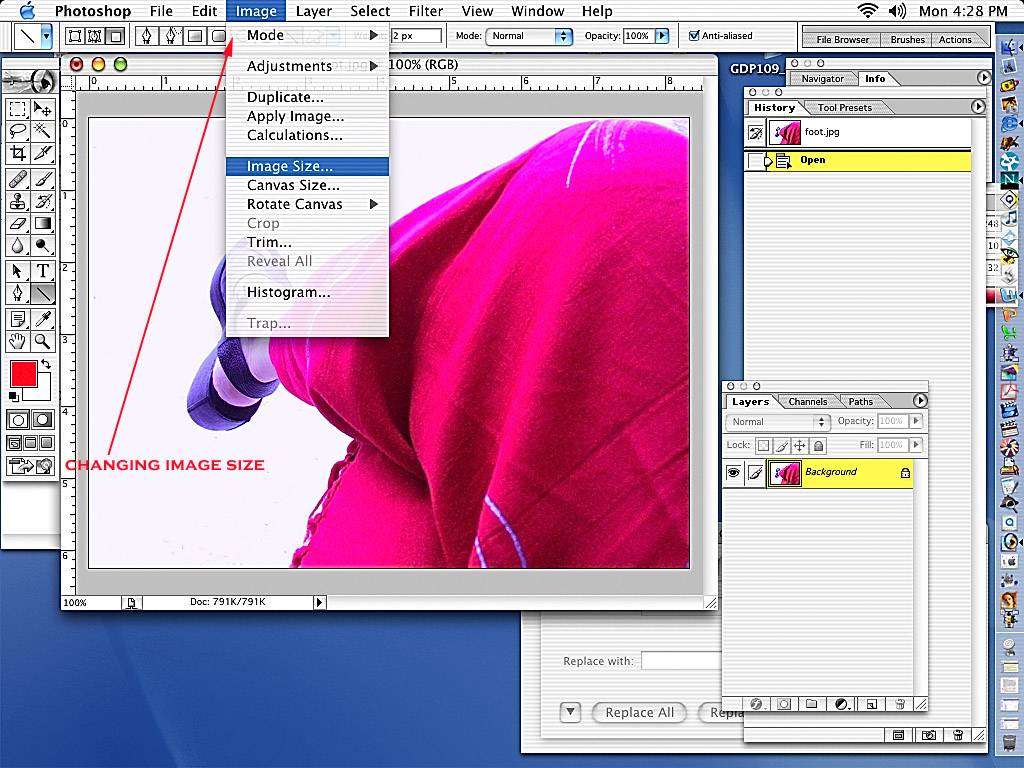
• Once you have opened the image(s) you will be using for
your assignment within Photoshop change the Image
Size by selecting Image>Image Size (see
below).
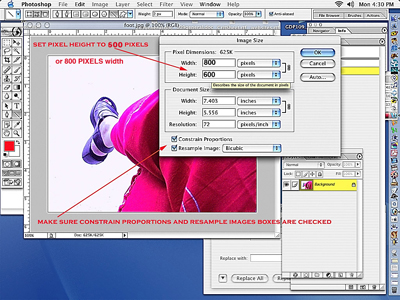
• In the window that opens change Pixels Dimensions>Height
to 600 pixels for vertical images (use 800
pixel width for horizontal images). For your PROFILE PHOTO change pixel dimensions to 150 pixels. Make sure that BOTH
Constrain Proportions and Resample
Image boxes are checked. See below.
• Save and Rename Your File(s) for uploading.
• Use the following naming convention for your files when
preparing them for uploading for a Moodle assignment
(be sure that the extension .jpg has been added to
the end of your file's name):
LastName_1.jpg (and
for more than one file)
LastName_2.jpg
LastName_3.jpg (and
so on)
•
Use jpeg files (.jpg) for assignment submissions; use photoshop
files (.psd) for printing photos from desktop printers.
•
If you use a PC (depending on the age
of your operating system), it's safest to use file names that do
not exceed 9 characters (letters or numbers) so use as much of your
last name as possible without exceeding 9 characters.
Example: Your name is Jane Smith,
your file will be saved as;
smith_1.jpg; your second image is
smith_2.jpg and so on.
|

