Create and save a new html document using Dreamweavers CSS layouts |
exercise files |
- File>New
- In the New Document window, select the following:
- Blank Page
- Page Type: HTML
- Layout: 2 column fixed, left sidebar, header and footer
- Layout CSS: Create New File
- Click Create
|
 |
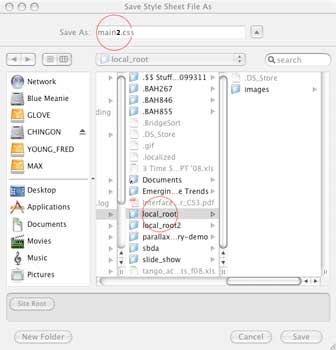
- In the Save Style Sheet File As window, rename twoColFixLtHdr.css to main2.css
- Select your local root folder, click Save
|
 |
- You will now save the new file you created...File>Save
- Rename the file index2.html
- Select your local root folder, click Save
|
 |
Add elements for SEO (search engine optimization) |
|
- In the Title: text box, type an appropriate page title (12th annual hog rally, e.g)
- select Insert>HTML>Head Tags>Keywords
- select Insert>HTML>Head Tags>Description
|


|
Edit the Dreamweaver "canned" CSS layout in the CSS Palette to be able to use the slices you created in photoshop |
- in the CSS Styles panel double click the .container CSS rule (click the All tab if this is not visible)
- In the CSS Rule Definition for .container in main2.css window:
- select Background from the Category column
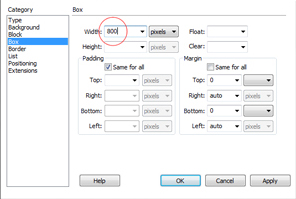
- select Box from the Category column
- Width: 800px (if you made your photoshop document wider than 800, use whatever width you made yours)
- the default margin settings will center your layout in the browser window. If you want your layout to be left justified: set the left and right margins to zero
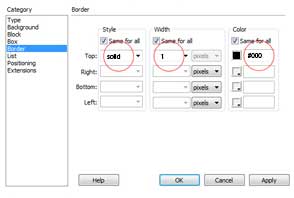
- creat a grey, 1 pixel, solid border
around your whole design:
- select Border from the Category column
- Style/Top: solid
- Width/Top: 1
- Color/Top: #666
- ensure Same for all is checked
- click OK
|
 |
- Double click the .header CSS rule
- In the CSS Rule Definition for .header in main2.css window:
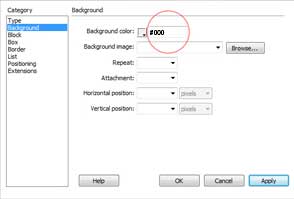
- select Background from the Category column
- Background color: select and delete the text (this will make the background transparent)
- click OK
|
 |
- Double click the .sidebar1 CSS rule
- In the CSS Rule Definition for .sidebar1 in main2.css window:
- select Background from the Category column
- Background color: select and delete the text (this will make the background transparent)
- select Box from the Category column
- Width: 150 px (or the actual width of the images that will be used for your nav bar)
- Padding:
check Same for all
- Top: 0 (all the numbers in the column should now be zero)
- click OK
|
 |
- Double click the .content CSS rule
- In the CSS Rule Definition for .content in main2.css window:
- select Type from the Category column
- select Background from the Category column
- Background color: select and delete the text (this will make the background transparent)
- select Box from the Category column
- Width: 600 px
- Padding:
check Same for all
- Top: 0 (all the numbers in the Padding column should now be zero)
- click OK
|
 |
- Double click the .footer CSS rule
- In the CSS Rule Definition for .footer in main2.css window:
- select Type from the Category column
- Font-family: Verdana, Geneva, sans-serif
- Font-size: 10px
- Color: #FFF
- select Background from the Category column
- Background color: select and delete the text (this will make the background transparent)
- select Box from the Category column
- Height: 50px
- Padding: uncheck Same for all
- Top: 12
- Right, Bottom, Left: 0
- click OK
|


|
Importing slices to and formatting the CSS layout |
|
- select and delete the image in the "header"
- click the insert images button in the Common toolbar
- in the Select Image Source window, open the images2 folder and double-click header.jpg
- in the Image Tag Accessibility Attributes window type the Alt text for this image (this should describe the image, not the file name)
|
 |
- delete the text in the "sidebar1" (DO NOT delete the green navigation bar)
- be sure you are in split or code view
- select and delete the text between the <p></p> tags
|

|
- format the Navigation bar:
- double-click the .ul.nav a, ul.nav a:visited rule
- In the CSS Rule Definition for .ul.nav a, ul.nav a:visited in main2.css window:
- select Background from the Category column
- Background color: select and delete the text (this will make the background transparent)
- select Box from the Category column
- double-click the .ul.nav a:hover, ul.nav a:active, ul.nav a:focusUp rule
- In the CSS Rule Definition for .ul.nav a:hover, ul.nav a:active, ul.nav a:focusUp in main2.css window:
- select Background from the Category column
- Background color: #8E3632
- double-click the .a:link rule
- In the CSS Rule Definition for .a:link in main2.css window:
- select Type from the Category column
- change the nav bar text to:
- about the rally
- gallery
- directions
- contact
|

 |
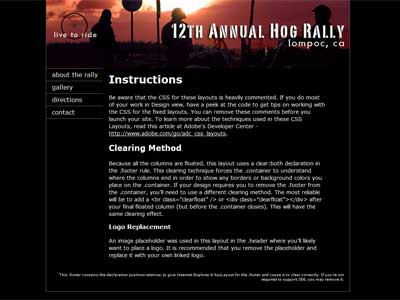
- Preview the file in a browser...it should look like this!
|
 |