I am expecting your Final project to contain several files with heavy-duty content (swf files containing bitmaps, animation, sound files...).
We need the projects to stream working from a Server.
Streaming works different than just playing from your hardrive, files neen to travel through a narrower band-width, what makes them appear slower on your screen as they are called.
You are going to upload your Final project into a server as part of the Final assignment and show it streaming from it.
We will practize doing that this week.
You can use any server that you have access to.
I am explaining how to work placing your files in a folder, in Google drive AND set tthe setting of that folder to Public, so everybody in the web can see it.
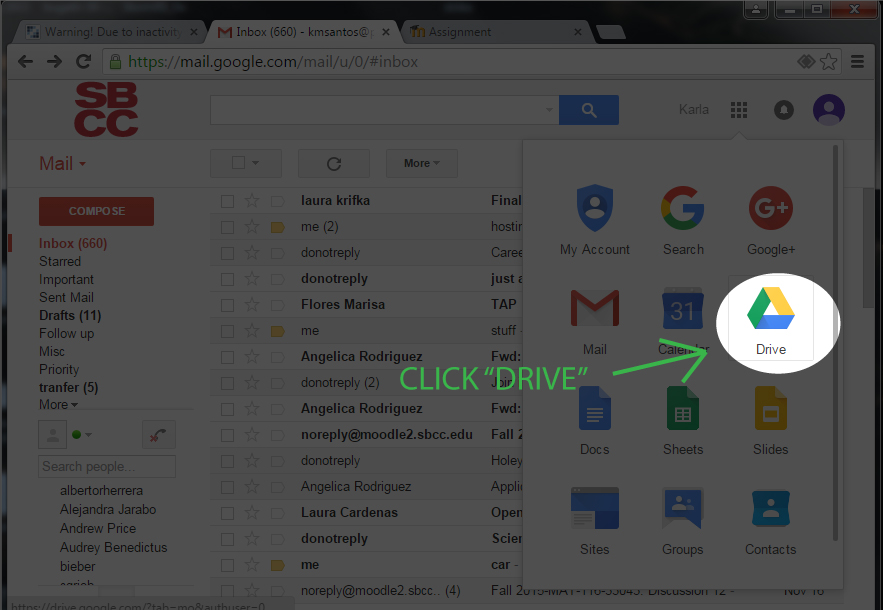
GOOGLE DRIVE As a student in the College, you have access to Google Drive, as another tool added to your school gmail account. To place your project-files in Google Drive, you will have to first acess your Gmail account, from there find Google Drive as part of your Google aps (Images below). |
PREPARING FILES.
You are going to need your swf AND the corresponding HTML file.
ASSIGNMENT 15
Since you are still working on your Final, we are going to practice with one assignment of your choice: past assignment, experiment that you have made on the side, or new assignment that you are putting together for the occasion for the week 15.
Add to a heavy fla (3Mb or more) a Preloading Animation, design elements and Script to the flash project of your choice. Look at the sample file called "root preloader".
For week 15, put your files inside a folder called "yourname_preloader". The folder should contain the html file and the swf file.
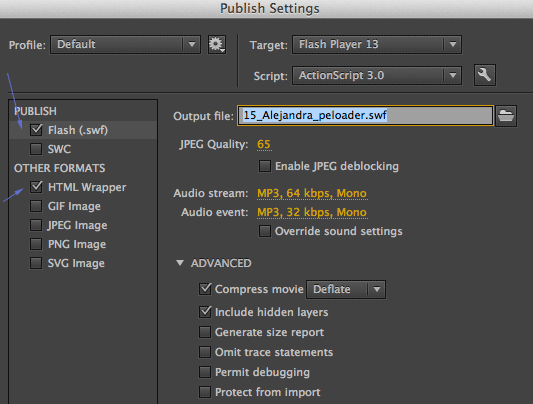
You can Create a simple html page inside Flash, by checking that option in "File<Publish settings"
Sometimes it can save your life to be able to re-compress bitmap compression (JPEG Quality) or Audio quality (Audio stream and Audio Event) on your way out to swf format. This will not change the dimensions of the fla project, though. Do not bother to tweak the html settings, you can try change the alignment settings of your swf but it will not happen in the browser. After you actually PUBLISH your project (File> Publish) Flash will export the "swf" file, plus a simple html document with the background-color set to the background color of your movie. They will be placed in the same location than the fla file. |
 |
TRANSFERING YOUR FINAL PROJECT TO THE SERVER (WEEK 16)
For your final project, put your files inside a folder called "yourname_final".
If you are loading external swf files in your project, ALL the external swfs should also be located in this folder, so they get uploaded to the server
| Log into your Gmail account |
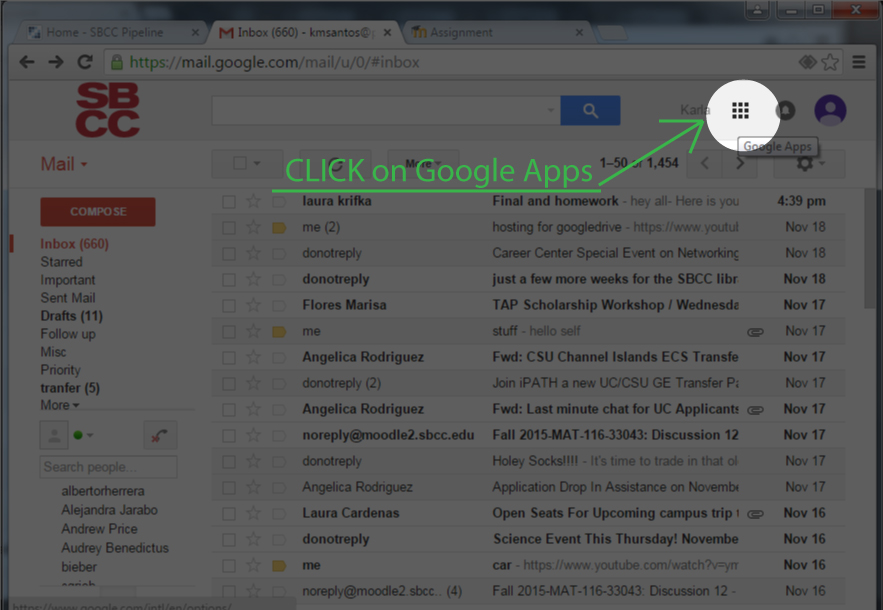
Every SBCC student has a Gmail account. Once in your school email account, Locate the Icon for Google Apps (nine little squares aligned as a bigger square). Click on it to Find the Google Drive App. |
|||
 |
||||
| STEP 1. |
|
|||
 |
||||
| STEP 2. |
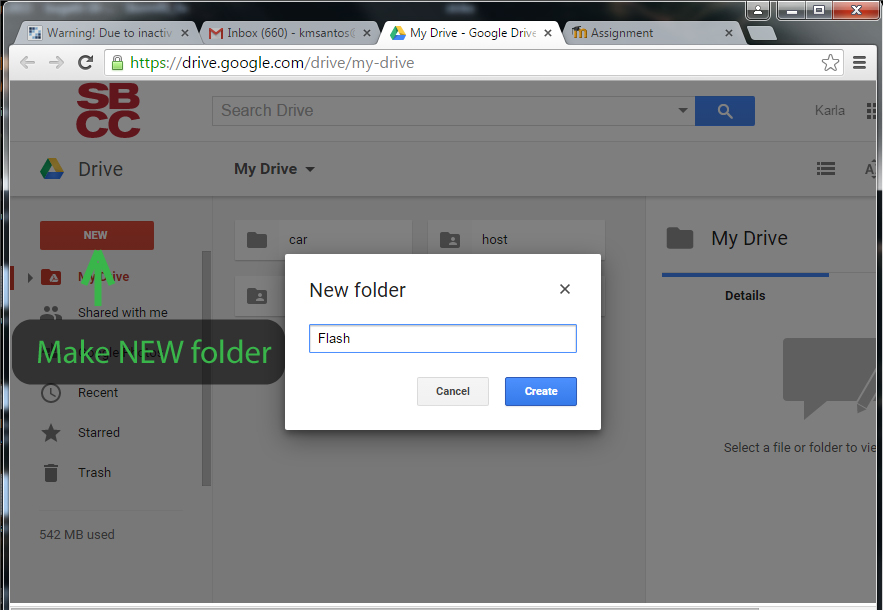
Once in Drive, Click on the NEW button to Make a NEW folder (your root folder that will contain your project files). |
|||
|
||||
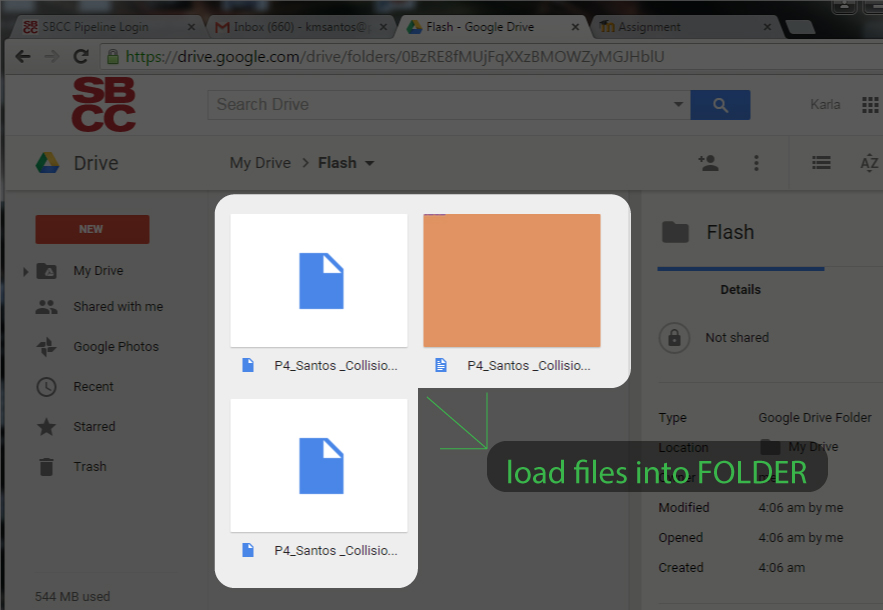
| STEP 3. | You will place the files for your project inside this folder (by loading them from your computer). _The swf file for your project (if you use external files in your Final, there will be several swf files) _The HTML file that you had Flash make when you last exported the swf (In Publishing options, look at the beginning of this page) |
|||
|
||||
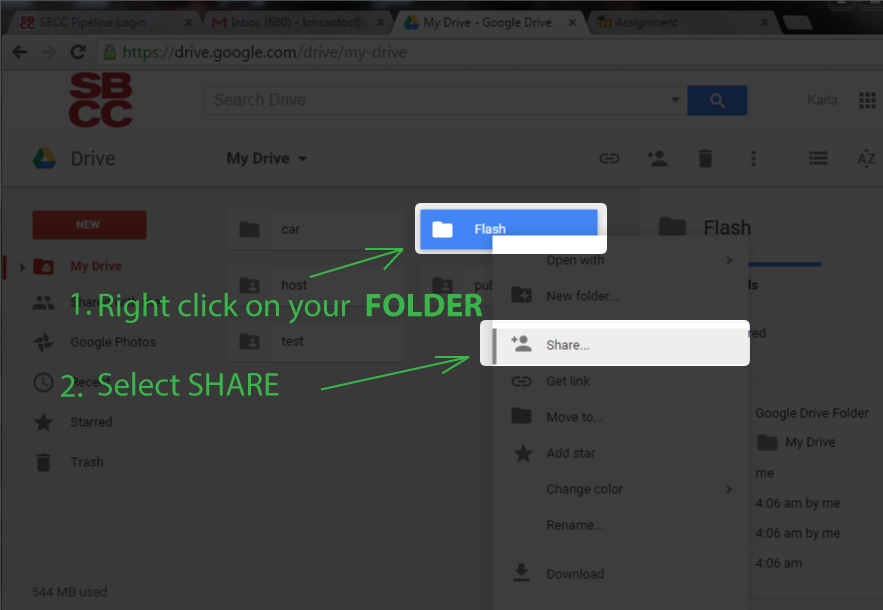
| STEP 4. | YOU ARE NOT DONE! Select your new folder (Flash) and select SHARE |
|||
 |
||||
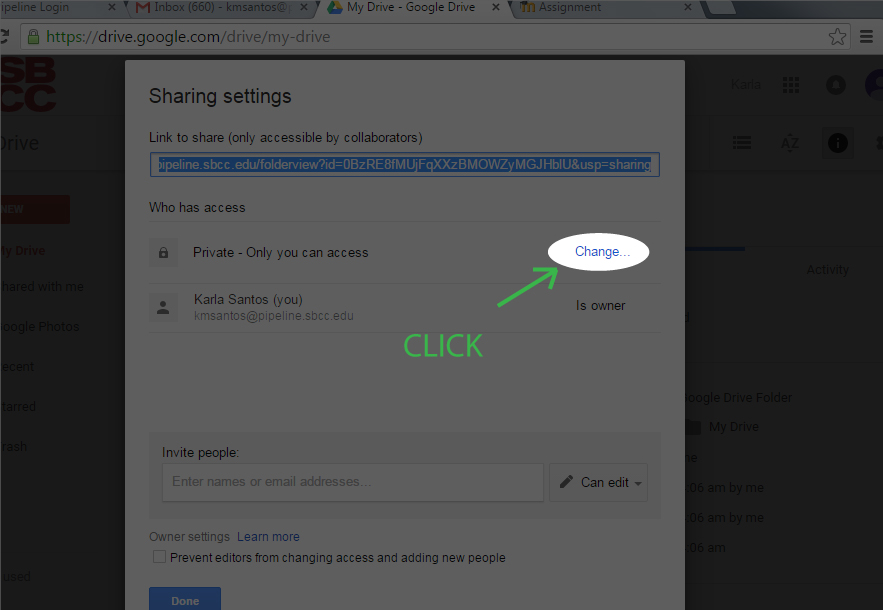
| STEP 5. | Once in "Sharing settings"
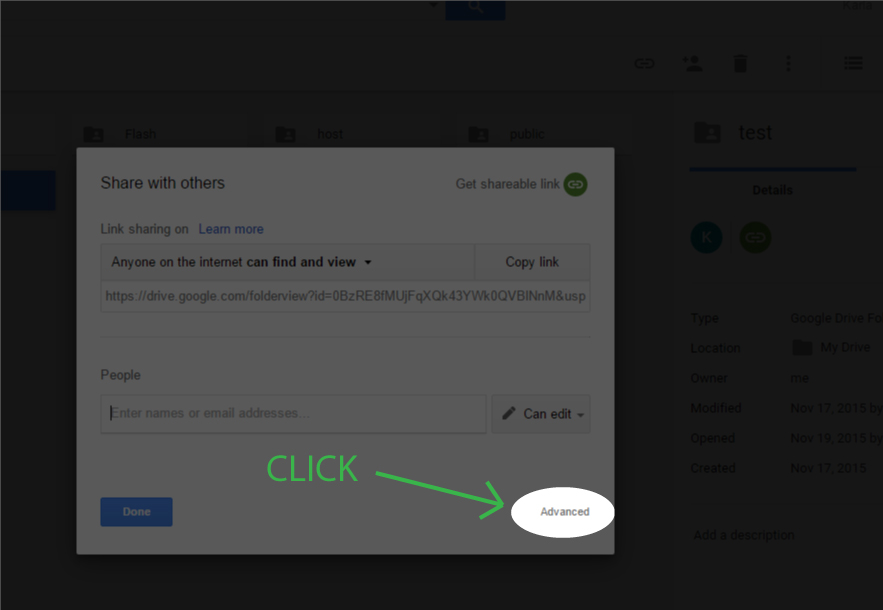
, Click on "Change" (right area of the dialog window) Next image: when we go through the process at school (might be the browser version) we have to Click on the Advanced option, under the Sharing settings, |
|||
|
||||
|
||||
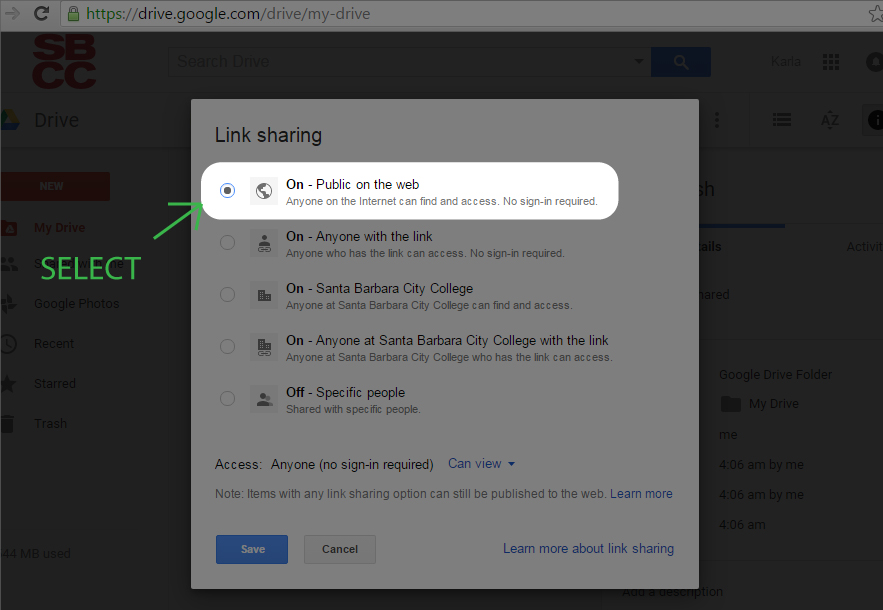
| STEP 6. | Set "Link sharing" to the first option: ON: Public, on the web. |
|||
|
||||
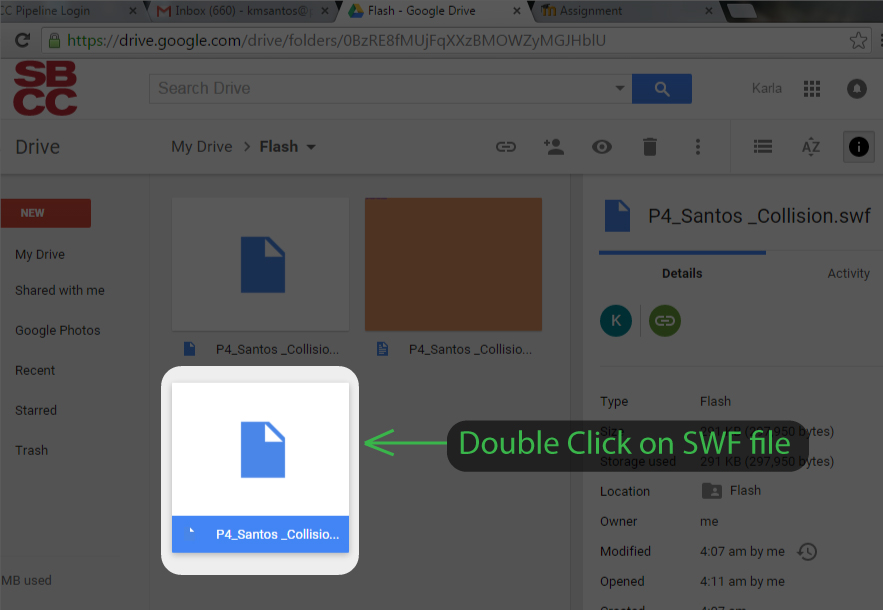
| STEP 8. | Now that your files are in Google Drive, inside your new folder, and the Sharing of the folder has been set to Public, We are going to figure out which is the exact link for the HTML file of the project (The exact URL that we have to call to see your project on the web). Because Google Drive is not direvctly a hosting server, This is going to take several steps. We will first find the public location of the swf file. Select and Click on your swf file |
|||
 |
||||
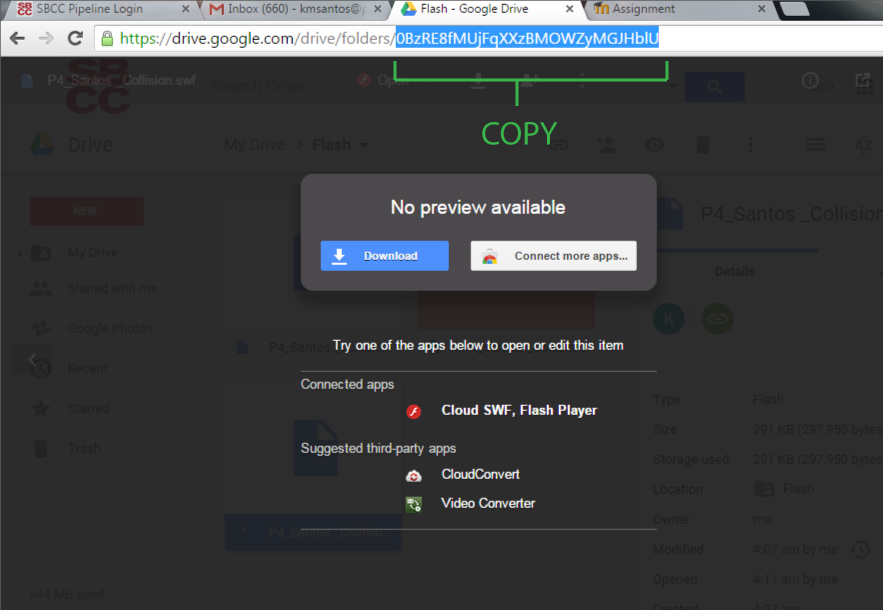
| STEP 8. | Copy the sequence of letters and numbers after the last slash, This is pinting to your project-folder on the web and will be part of your URL After that open a new window to type, or modify the URL so you get: https://googledrive.com/host/ |
|||
 |
||||
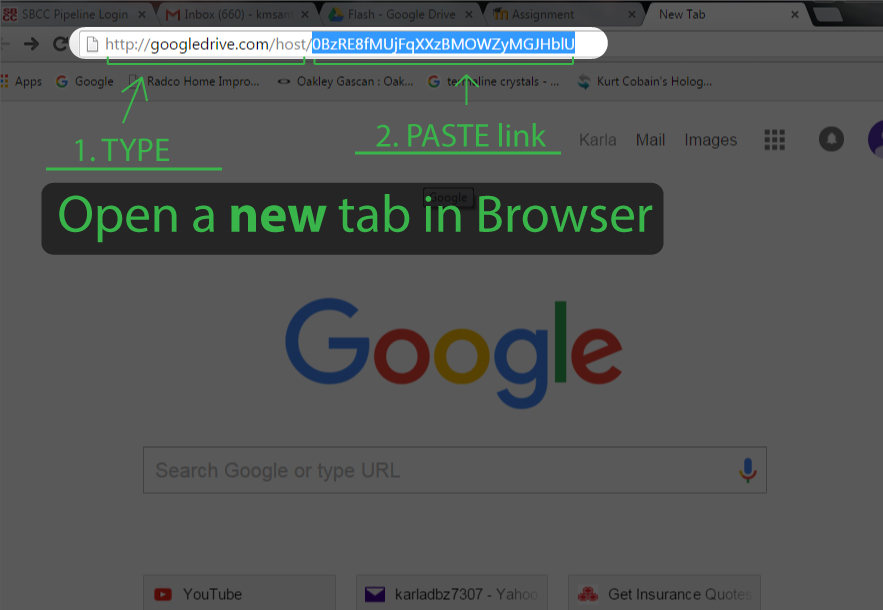 |
||||
| STEP 9. | The previous URL has tken you to the public web address of your Folder (the shared project folder that contains your files). You should see the content of your folder in a list. Now you want to Click on the HTML file to open it on a web-mode, what is: in a browser |
|||
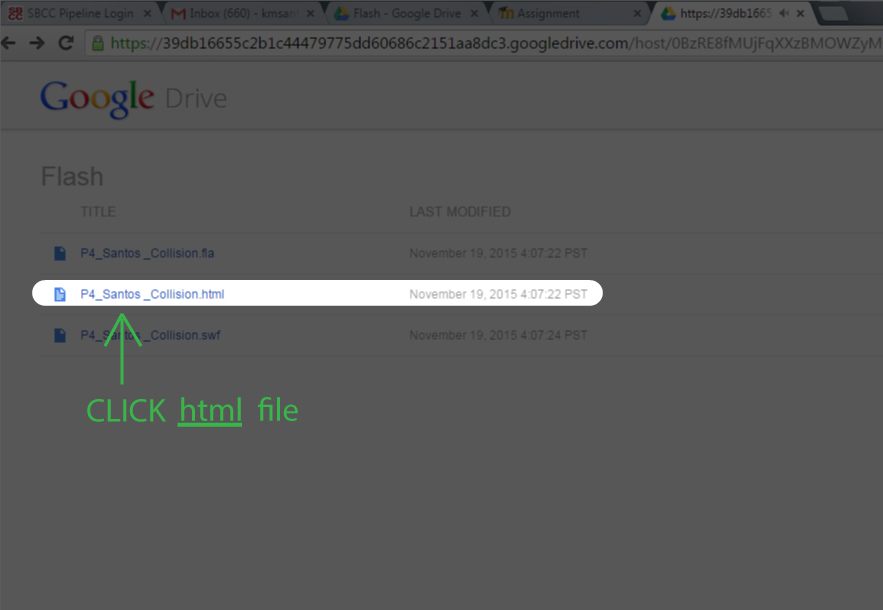 |
||||
|
||||
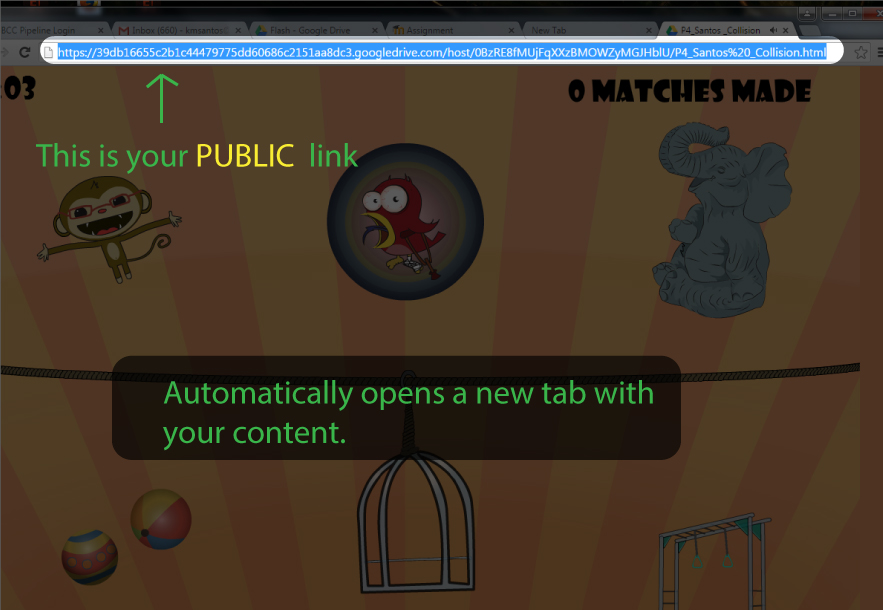
| STEP 10. | You should see your project now in the browser Look up on the browser and look for the URL field, Paste that URL in the comments area in your Assignment submission, you might also want to write it in an email to yourself AND a friend of yours, so he/she can check if the link works. |
|||
|
||||
|
||||
