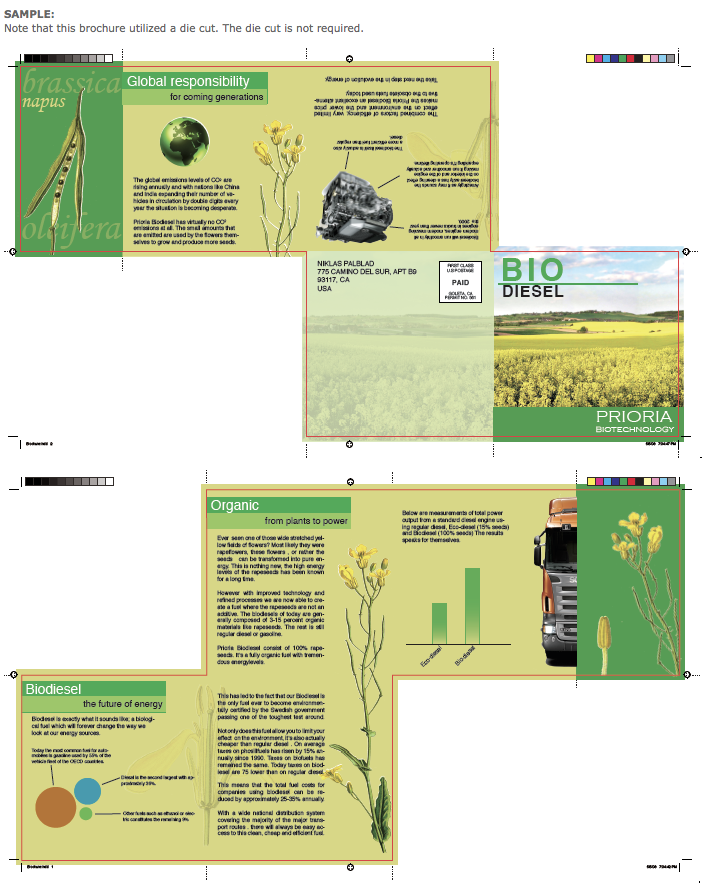
To create a diecut, you need to create a Dieline-colored plate, which will be output separately so the craftsman printer can build the embossing or cutting die accurately.
Create a spot color layer, named "Dieline" so its meaning is obvious.
You may want to choose some strange color for it (RGB bright green, for example) which does not appear in your layout, so you can see exactly where it goes.
Then you simply draw an outline showing the shape to be embossed, debossed or diecut.
Talk to printer regarding: adjusting the trapping settings for the Dieline ink so it overprints everything; you do not want the dieline to be knocked out of the artwork!)
As a last, final check for any tricky print job, print out separated laser prints of the job. You can lay them over each other on a light table and confirm the job behaves as you expect it to, and that nothing is missing.
• Fold marks/lines:
Manually add fold lines (dotted lines, set to registration color so they print on each color plate) that begin .125" (9pts) from the document trim line and are .5" (36pts) long.
The fold lines will be different on each page (front and back) because of the folds. Experiment with folds.
• Also select "crops" and "bleed" in the print dialog box.
That way your crop marks and bleed will show on the paper.
• Make sure All images to bleed, MUST extend.25" (18pts) BEYOND the set bleed line in order for it to print as a bleed. This also allows the fold lines to print.
• Panel sizes - In a 3 panel brochure the cover and back panel will be 1p larger than others. If more than 3 panels, reduce additional panels 1p each time it folds in.
Do not limit your design to a regular paneled brochure.
• Bleed - Set bleed lines in Document setup. Add .125" (9pts) bleed line if images or art butts up to edge of the design trimline. All images to bleed, MUST extend.25" (18pts) BEYOND the set bleed line in order for it to print as a bleed.
• Crop marks will be set automatically when saved to PDF.
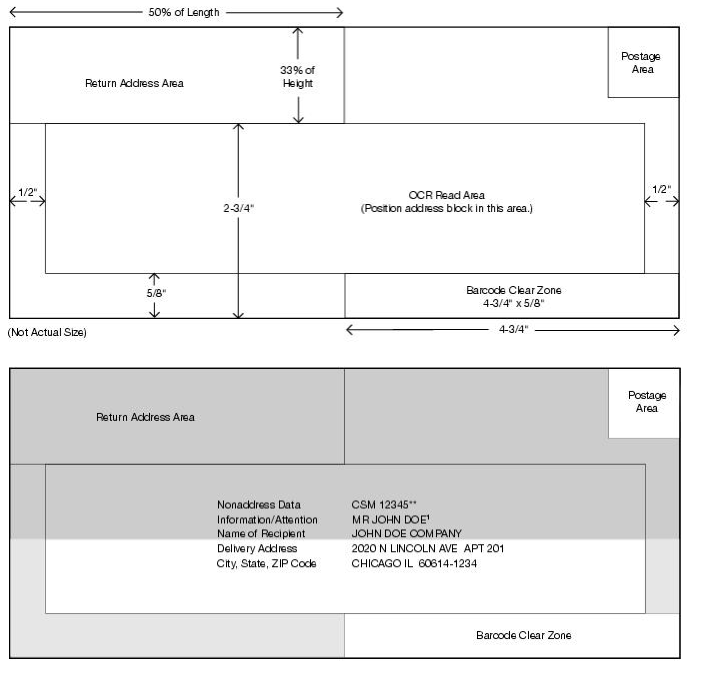
• Self-mailer: Return address & indicia (with info inside it) must be included on one panel. Check the US Post Office site for mailing specifics and how to set up the indicia.
• Place the indicia in the upper right hand corner about .25" from fold line and from edge of paper.
• The indicia is a one inch box (with a frame) and contains the following (or the permit # of the company) and is usually no larger than 10 point type:
PRSRT STD
US Postage
PAID
Santa Barbara, CA
Permit No. 1234
• Return Address goes on the mailing panel usually in the upper left hand corner about .5" (3p) from fold line and from edge of paper.
• Keep point size appropriate for information and font used. Usually 9, 10 or 11 point will work.
• Make sure to be creative with this panel. It is the first thing the recipient sees. Any art in the area of the indicia or mailing address (not return address) MUST be no more than 10% of any color unless the color is a pastel.