Color Separations
Definition: On a printing press each color of ink used in a document is printed one at a time. Each printing plate used on the press is made up only of components of the page that have that one color.
Spot color separation, is used to separate colors that are not to be mixed. In this case, each spot color is represented by its own ink, usually Pantone (PMS). Spot colors are effective for flat graphic elements and type but they cannot be used to reproduce full-color images.
Each different color will need it's own film negative and/or printing plate in order for it to print properly.
A one color job will have only one plate,
A one color job with several different
screens (different values of a color - 10%, 33%, 46% etc.) will have only one plate with dots that represent the percentage of value change.
A two color job will have only two printing plates.
A four color job will have four plates.
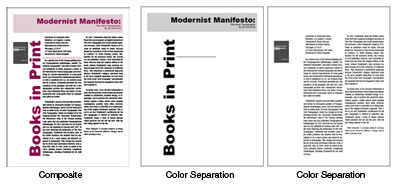
Example to the right is of a COMPOSITE (entire layout) and each color separation for a 2-color printing job.
How do you know you have chosen spot colors and that they will separate correctly before going to the printers?
Paper Separations or Color Separations (same
thing)
Before a file is sent to the printer, a paper printout of each color must be printed from your black and white postscript laser printer (inkjet printers need special software to print color separations). These are printed proofs
that show the correct elements have the correct
colors applied to them for spot color images.
Paper separations and color separations are terms often used interchangeably. This is the way to check that you have indeed used the correct number of colors.
Although the term color separations is used, the separations are not in color but they represent each color.
At the print shop, Film negatives (negs or film) are made and these represent the color information for each particular color in a layout. The film will look similar to the paper separations.
Each piece of film contains the flat color area for each SPOT (PANTONE) COLOR and the range of dots to create any screens(different values) of that color.
These film negative separations are produced using an imagesetter (high-end printer).
The film is then placed on the light sensitive printing plate and the plate is processed using a special light.
DTP or Direct to Plate
This form of printing eliminates the need for a film negative.
The information is "etched" directly to the printing plate. These plate separations are produced using an imagesetter, a high-end printing device.
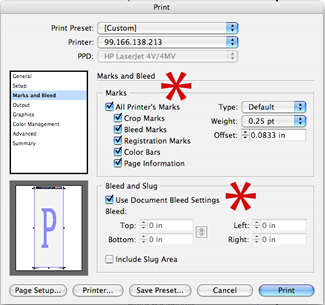
ALWAYS, always, always use the Indesign function SEPARATIONS PREVIEW before you print paper separations to be sure you have used the correct number of colors.
WINDOW>OUTPUT>SEPARATIONS PREVIEW
MORE TERMS Relating to Color OFFSET PRINTING
Crop Marks
Marks positons to indicate where printed piece needs to be trimmed. These marks NEVER touch the trim line.
When a layout includes a BLEED, the element will BLEED into the crop mark.
Registration Marks
Marks with crosshairs inside a circle (as in a rifle scope). These marks are placed on all four sides of EACH color separation so all colors can be aligned accurately. Each color plate must align exactly using the registration marks as a guide.
Register
When a printed sheet is 'in-register', it means that all the plates are lining up accurately on the printing press and producing a clearly defined color image.
If a job is out of register, there will be a blurring at the edges of images that are made up of more than one color.
Bleeds
A printed image(graphic, area of color or type) that extends beyond the trim edge of the paper.
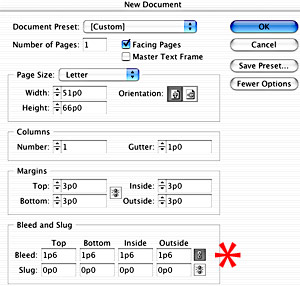
To set a bleed in Indesign:
When a bleed is to be used in the layout set the bleed amount s you are setting up the document.
...FILE>NEWDOCUMENT dialogue window
...Set the DOCUMENT SIZE of the PRINTED piece,
...Select OPTIONS on the right side
...Bleed and Slug area at bottom of box
(BLEED area of your document is set here.)
...Type in .25" or 1p6 (the software will translate the inches into points and pica measurements and vice versa)
...and Click the lock symbol (This will add the same amount of bleed on all four sides of the document).
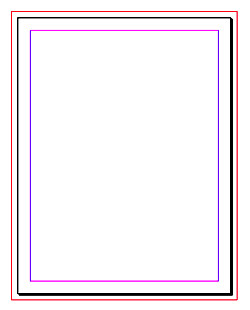 When your page appears, it will have a red
line around the entire document. Bleed (drag) your image to
touch that line.
When your page appears, it will have a red
line around the entire document. Bleed (drag) your image to
touch that line.
This must be done to have the bleed appear in the separations.
Once you have properly set up your bleed, you will also have to remember to USE the bleed settings when printing and when exporting your files to a pdf.