Styling text using CSS
Joseph Lowery
This video shows you how to style text using the CSS panel, instead of using the Property inspector. You also learn how to tackle cross-browser CSS rendering issues using CSS Advisor.
Requirements
To follow along with this article, you will need the following software and files:
- Dreamweaver CS3
- Sample file (ZIP, 6.7 MB)
Watch this tutorial in the Adobe Creative Suite 3 Video Workshop.
Styling text with CSS
-
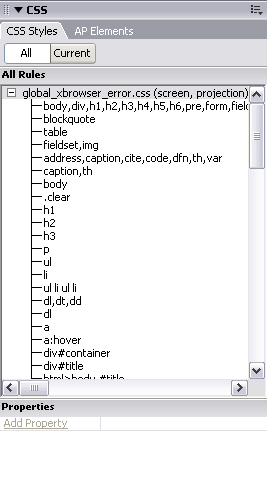
In Dreamweaver, choose File > Open and open the 02_styling_css.html file. This document contains a large number of CSS rules that appear in the CSS Styles panel (see Figure 1). If the CSS Styles panel is not open, choose Window > CSS Styles to open the CSS panel group.
How do you locate one specific style to update? Dreamweaver makes it easy with this panel.

Figure 1: Locate and update styles using the CSS Styles panel.
- In the CSS Styles panel, choose the
h2#blog_headertag, the heading starting "New Issue of Aquo Life Out Now!" - Choose
the CSS Styles panel and choose Current mode. In Current mode, you can
see a summary of the styles applied to the element and the relevant
rules that apply to all elements on the selected page, including the
h2#blog_headertag. - Select the
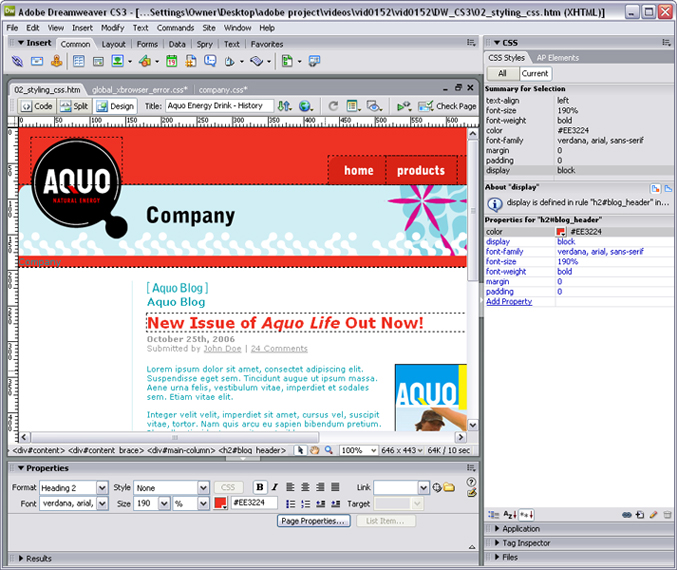
h2#blog_headertag in the CSS Styles panel. Click the color box in the Property inspector and move your pointer to the Document window to sample the red background color. -
Deselect the text to see the updated font color (see Figure 2).

Figure 2: The blog header color is updated using the CSS rule on the right.
- In the Document window, select "John Doe."
- In the Rules area of the CSS Styles panel, notice that the
p#blog_date a:hoverrule is automatically highlighted. Instead, select thep#blog_date arule to change the appearance of the unselected link. - Make sure the Property inspector is open. If not, choose Window > Properties to open it. Go to the Property inspector and choose None from the Text-Decoration pop-up menu.
-
To indicate it is still a link, click Add Property. Type font-weight for the property and choose Bold from the pop-up menu. The contributor's name now matches the other link elements on the page (see Figure 3).

Figure 3: The author's name is styled with CSS to match the other link elements on the page.
Checking compatibility across browsers
How do you know your styles will show up when your page is viewed in different browsers? Dreamweaver CS3 has a new browser-compatibility check that helps.
- In the toolbar above the Document window, click Check Page.
-
Choose Check Browser Compatibility. Dreamweaver scans the page and locates specific CSS bugs. This example shows the Disappearing List Background bug (see Figure 4).

Figure 4: The Browser Compatibility check shows a bug and a link to find solutions.
- View the description of the problem in the Browser Compatibility Check panel.
- Go directly to the code by double-clicking the Line/Issue entry. The attached external style sheet, company.css file, opens.
- Choose the file's tab to go directly to the CSS rule or rules in question.
- Return to the HTML file.
-
Go to the Browser Compatibility Check panel and click View Solutions to access the new CSS Advisor link.
CSS Advisor is an advanced wiki-formatted Help page on the Adobe website. It includes information from the Dreamweaver user community and experts. Here you can get details about the specific bug, both problem and solutions, including example code. It's a great new feature for editing CSS in Dreamweaver.
Where to go from here
For more information and additional tutorials, visit the Adobe Design Center.