Styling forms with CSS
Joseph Lowery
This video shows you how to change the appearance of form fields using CSS. You create a new class for the form labels, and apply the style to labels in your form using the Property inspector. You create another style to affect the look and feel of the form elements.
Requirements
To follow along with this article, you will need the following software and files:
- Dreamweaver CS3
- Sample file (ZIP, 6.7 MB)
Watch this tutorial in the Adobe Creative Suite 3 Video Workshop.
Styling forms with CSS
-
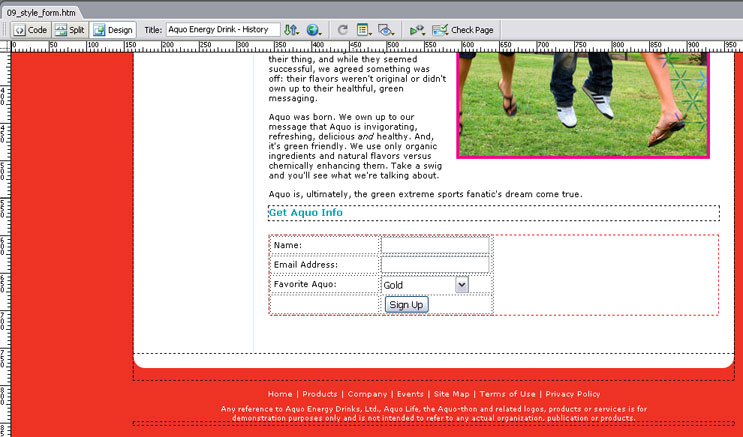
In Dreamweaver, choose File > Open and open the 09_style_form.html file. You'll start by creating and applying a style to the labels in the form at the bottom of this page (see Figure 1).

Figure 1: Use CSS to create and apply a style to the labels in the form.
- Choose Window > CSS Styles to open the CSS panel group and then choose the CSS Styles panel. Click the New CSS Rule button at the bottom of the panel. This opens the New CSS Rule dialog box.
-
In the New CSS Rule dialog box, select the following options:
- Select Class as the selector type and type .formLabels in the Name text box.
- Select This Document Only to store the rule in this page and click OK. The CSS Rule Definition dialog box opens.
- Choose Block and choose Right from the Text Align pop-up menu.
- Choose Type and select Bold from the Weight pop-up menu.
- Choose Box and deselect Padding: Same For All. Type 10 in the Bottom text box.
- Click OK. The style now appears in the All Rules pane of the CSS Styles panel.
-
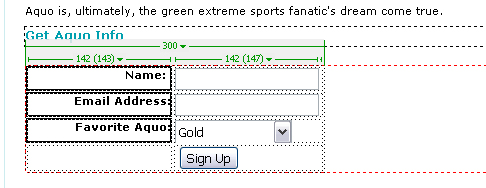
Make sure the Property inspector is open. If not, choose Windows > Properties to open it. To apply the style, select all three labels in the form table in the Document window; go to the Property inspector and choose formLabels from the Style pop-up menu. The labels are instantly updated (see Figure 2).

Figure 2: The new style is applied to the form labels.
Styles can also apply to form elements, such as text input fields. You'll create a new style specifically for the ones on this page.
- Choose the CSS Styles panel and click the New CSS Rule button.
-
In the New CSS Rule dialog box that appears, choose the following options:
- Select Advanced as the selector type.
- Type input, selectin the Selector text box. You enter two values because the form has two different types of form fields, text input fields and a list field.
- Select This Document Only to store the rule in this page.
- Click OK. The CSS Rule Definition dialog box opens.
-
In the CSS Rule Definition dialog box, choose the following options:
- Choose Type, and select Verdana, Arial, Helvetica, sans-serif from the Font list. Select Bold as the weight.
- Choose Background and click the color box to select a background color. Go to the Document window and select the turquoise color from the Get Aquo Info heading font.
- Click the color box again and select the color wheel from the top of the dialog box. This opens another Color menu. Use the slider on the right to lighten the hue and click OK.
- Choose Box and deselect Margin: Same For All. Type 10 in the Bottom text box.
-
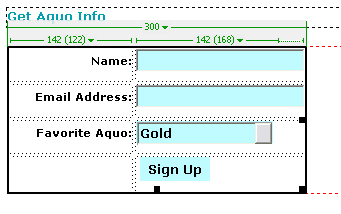
Click OK to see the style take effect (see Figure 3).

Figure 3: The form fields are styled with color from the head font.
Now you'll add a fieldset element that wraps the entire form and visually separates it on the page.
- Go to the Forms tab in the Insert bar and click New Fieldset. This opens the Fieldset dialog box.
-
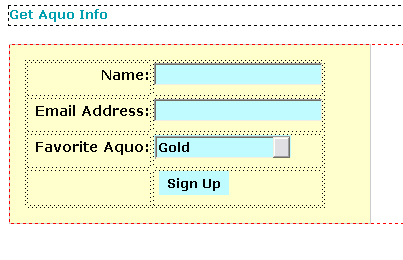
Type Enter to Winin the Legend text box and click OK. A new box surrounds the entire form element (see Figure 4). A fieldset style was already created for this element and is automatically applied.

Figure 4: Adding a prestyled fieldset visually separates the from on the page.
- In the toolbar at the top of the Document window, click the Preview in Browser button and choose Hide All Visual Aides to preview what the page will look like in a browser window.
Where to go from here
For more information and additional tutorials, visit the Adobe Design Center.