Creating links
Garrick Chow
This video shows you how to create email links, text links, and image links to internal and external pages. You learn how to use the Link box, folder icon, and Point-to-File icon in the Property inspector to create links for text or images. You also learn how to add e-mail links using the Insert bar.
Requirements
To follow along with this article, you will need the following software and files:
- Dreamweaver CS3
- Sample file (ZIP, 4.8 MB)
Watch this tutorial in the Adobe Creative Suite 3 Video Workshop.
Creating links
-
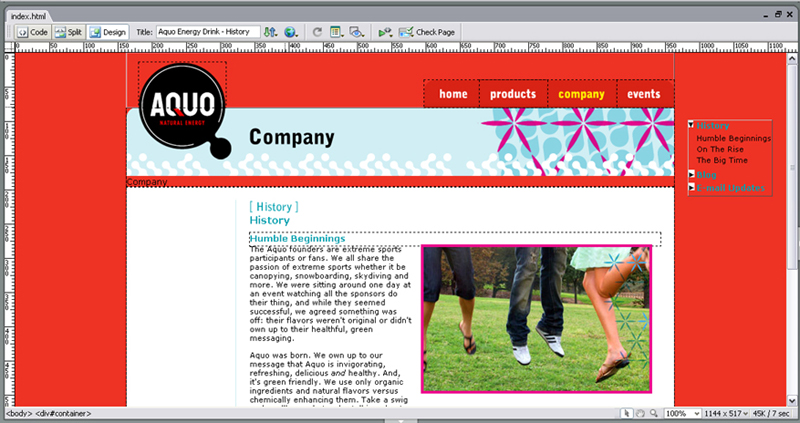
In Dreamweaver, choose File > Open. Open the Company folder and select index.html. Click Open. (see Figure 1).

Figure 1: The Index.html file opens in the Document window.
- Scroll down to the bottom of the page where the words and phrases that will eventually become links are located. They currently appear as text.
- Start by selecting the word "Products." Make sure the Property Inspector is open. If not, choose Window > Properties to open it.
-
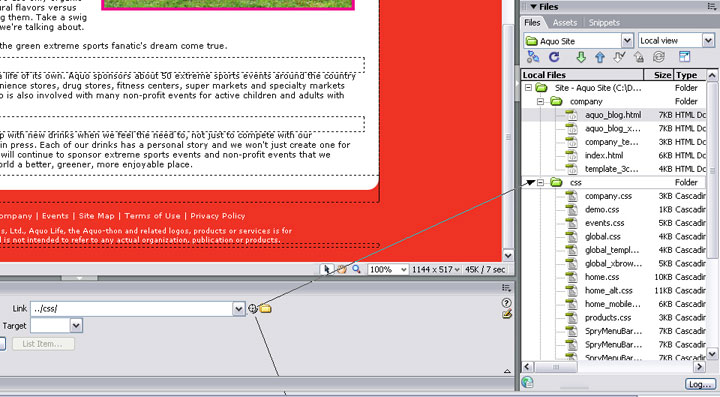
Go to the Property inspector and click in the Link text box. Click the folder icon to browse to a file on your hard drive (see Figure 2). This is easier and results in fewer typos than typing a URL.

Figure 2: Click the Folder icon next to the Link text box to browse for the file.
- Click the Point to File icon to display a widget that lets you point to a file to select it in the Files panel.
-
Drag to choose the index.html file in the products folder. The address automatically appears in the Link text box in the Property inspector (see Figure 3).

Figure 3: Click the Point to File icon and drag its widget to link to files in the Files panel.
- In the Document toolbar, click the Preview in Browser button and choose a browser. At the prompt to save changes, click Save. This opens the web page in the selected browser.
- Click the Products link you just created to be directed to the products/index page.
- Close the browser window.
Turning images into links is just as easy.
-
In the Document window, select the image, photo_jumping.jpg, and go to the Property inspector. A Link text box appears here too, in a slightly different location.
Again, you can type in the URL, browse to the file, or point to the file. Be careful not to choose the Point to File or Browse buttons next to the Src text box. The Src option determines the location of the image, and shouldn't be changed.
All the links you've created thus far have been internal links, meaning that they point to files or assets elsewhere in the defined site. The links are also relative URLs, meaning that each link address is relative to the page the link appears on (for example, Products/Index.html). However, you may want to link to locations elsewhere on the internet (outside your webpage). These are called absolute URLs, and you must provide the exact address of the page you want to link to, including http://www, and so on.
- Select Events in the Document window, and change the text to Adobe.
-
Go to the Property inspector. To link to the Adobe website, type http://www.adobe.com in the Link text box; you can't just type "adobe.com." If you have a long address, find the page in your web browser, and copy and paste the URL into the Link text box in Dreamweaver to avoid mistakes.
The last type of link is an email link. This kind of link opens a new email in the user's mail program with the To text box already filled in.
- To add an email link, put the insertion pointer after "Privacy Policy" in the Document window. In the Insert bar choose Common from the pop-up menu, and click the Email Link icon. This displays the Email Link pop-up menu.
-
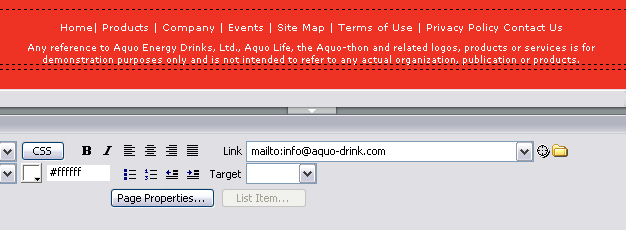
Type Contact Us in the Text text box; this is how the link will appear on the page. Type info@aquo-drink.com in the Email text box; this is the actual email address. "Contact Us" is automatically added to the list items (see Figure 4).

Figure 4: The Contact Us link is added to the document and the email link appears in the Property inspector.
- Choose Preview in Browser in the Document toolbar.
- In the Document window, click the Contact Us link once to open the web page. Your default email program will open with the address "info@aquo-drink.com" in the To text box.
Where to go from here
For more information and additional tutorials, visit the Adobe Design Center.