These are the Instructions for the Fifth module of this course:

We are going to study the use and creative possibilities of the second Flash Animation Assistant:

_Motion Tween.

In the Classical animation industry, the animator draws the Keyframes or extreme poses, then gives a graphic to a junior animator with indications of how many in between drawings are needed to create the smooth motion effect. This is why Flash animation assistants are called "tweens".


The Motion-tween (from Flash CS4) is an animation assistant that allows you to display a smooth transition between keyframes setting DIFERENT properties values of ONE symbol: scale, position, rotation, skew, color effect.

Motion tweens happen in special kind of layers called tween layers (you can set a normal layer to be a tween layer by right clicking on it an choosing that option)


The IN keyframe looks like a normal flash keyframe, but the out keyframe looks like a diamond, and it's called "an anchor point" in your book.
After an initial keyframe you can have several anchor points that keyframe different properties.
Motion Tweens follow a motion path that can be curved with bezier points.
To control changes in speed, motion tweens can be controlled and tweaked with the Motion Editor.

Refreshing some concepts around symbols:

Graphic symbols.

To better understand the use of motion-tweens and Flash underlining structure, we should refresh the general concept of Symbols in Flash.


Shape combinations can be converted into graphic symbols, this way flash will not have to recalculate the geometry every time you include it on a keyframe.

Once you have converted a piece of artwork into a graphic symbol, you can drag as many copies of it
into the timeline as you want (only one per layer if you want to do a motion tween).


Each "copy" of the library-symbol is called an instance.
Each instance is a "perfect" copy of the "original item" living in the Library.
If you edit the original symbol, every instance on Stage that derives from it will also change.
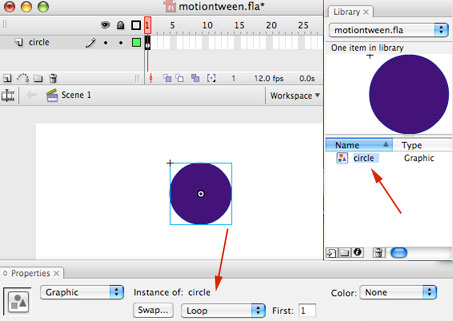


See the graphic symbol in the Library (right side)
and the instance on Stage, and how it is indicated when selected.
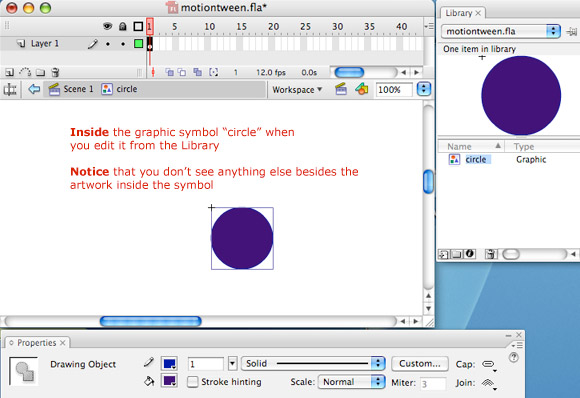
 

Editing a symbol.

There are 2 ways of editing a symbol in Flash:


1. Double-click the symbol from its icon in the Library to edit it.

It will take you to a "special timeline" where only the symbol artwork exists
(this is the space inside the symbol).

There is no reference of what is happening on Stage: you are isolating the symbol itself.
You will see the artwork against the background color of the project.

REMEMBER that you can use several layers inside a symbol to organize the artwork.


Click on the lower bar of the Timeline, were it says "scene 1" to come back to the main Stage/Main Timeline and leave the space inside the symbol.

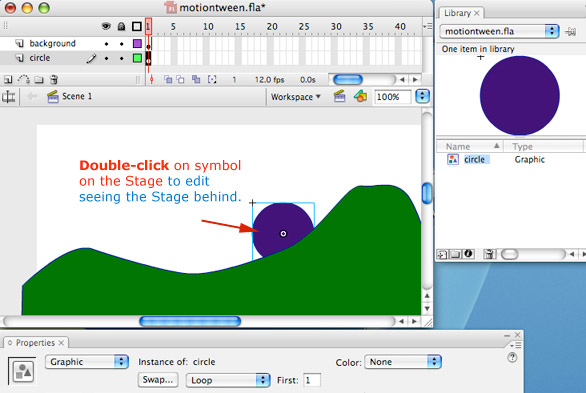
2. You can also edit the symbol from the main Stage, by double-clicking the instance of the symbol, already on the timeline.

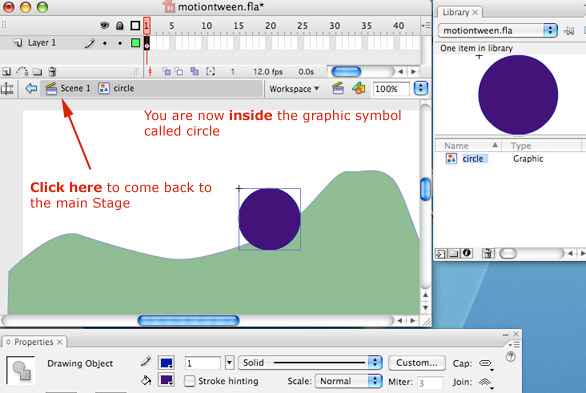
If you try to edit the symbol this way, you will also go to the "special timeline" where the symbol's artwork exists,
but this time you will be able to see the other elements out on the Stage at that point in time.

The other elements on the Stage will have "a washed-out look" and you will not be able to alter them in any way.
(imagine that you are INSIDE the symbol and what it's back on the Stage covered with a semitransparent veil).


See how to edit a graphic symbol from the Stage
How to come back to the main Timeline's Stage after editing a symbol