How to Group and Ungroup artwork:
Apple/Command_G ......for grouping
Apple/Command_B.......for break apart (shapes created with Object-mode ON, can also be broken apart)
If you double-click on a group, the program will take you to the content of the group "in isolation mode" so you can edit it. You will have to come back manually by looking up the stage to the arrow that points back to "the Scene" and out of "the group".
Do you know how to use the different primitive-shape tools included in the rectangle tool?
To make rectangles with rounded corners change the roundness in the Properties panel, with the rectangle tool selected.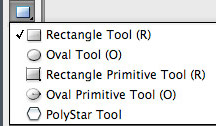
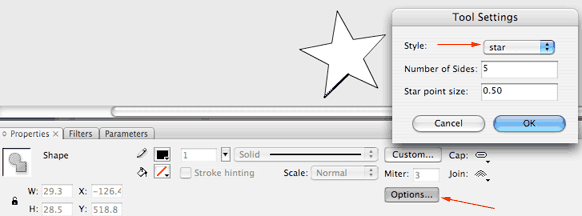
If you go to the PolyStar tool, the default will be the polygon tool.
You will have to go to the Properties panel and click the Options button, to change into the Star tool.
(Click options>change the Style to star in the Tool settings dialogue box).
Do you understand how to select and deselect flash objects?
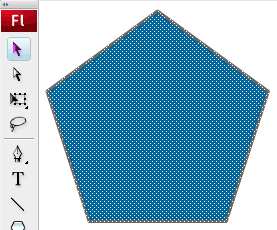
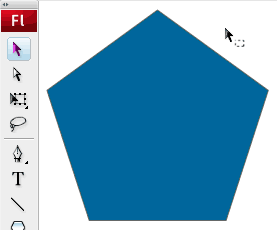
How are the black and white selection tools differ from each other?
 |
 |
 |
||
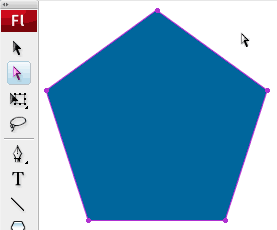
Shape and stroke selected To deselect click on an empty area. |
Shape and stroke unselected To select a shape with stroke doubleclick the shape, |
Shape selected (working with the white arrow tool). Switch back to the Black arrow tool when you are done. |
Do you understand the difference between the Merged Drawing mode and Object Drawing mode?
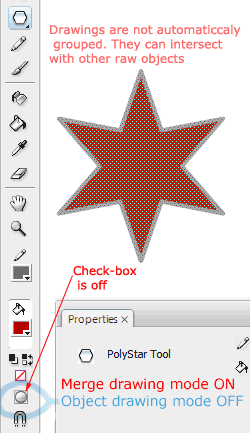
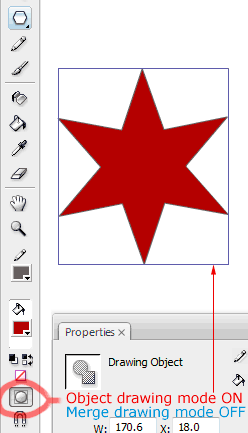
Those are 2 different ways of drawing in Flash, and it all depends on the toggle button (circled) being pressed or not.
|
MERGE DRAWING MODE
|
OBJECT DRAWING MODE
|
|
|
 |
 |
||
Overlapping shapes in the same color will add, resulting on a bigger, indivisible shape. When you obtain a desired shape, you can "protect it" from being modified by grouping it (Apple_G, or Control_G). You can Break a group and come back to the natural merge mode environment, by clicking |
You cannot modify its shape by changing points, or the curves between the points, or subtracting/adding to the original shape with other drawing tools. At the very beginning this might looks like a good thing to you, but you cannot construct complex shapes with this mode. |
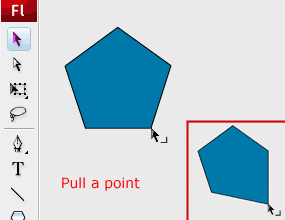
MODIFY A SHAPE BY MOVING POINTS |
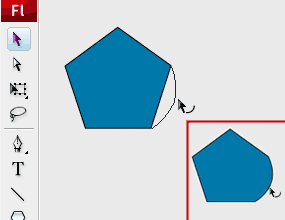
MODIFY A SHAPE BY CHANGING THE CURVES BETWEEN THE POINTS |
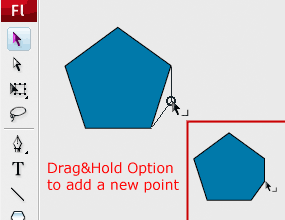
MODIFY A SHAPE BY ADDING POINTS |
||||
 |
 |
 |
||||
Working with the black arrow tool,you can modify the point's position by dragging it. Notice how the cursor changes to a cursor with a little corner when Flash recognizes that you are rolling_over a point. |
Working with the black arrow tool, you can modify the curve-tension between 2 points, by dragging the space between both points. Notice how the cursor changes to a cursor with a little curve when Flash recognizes that you are rolling_over a curve area. |
Working with the black arrow tool, you can add a new point to your shape by dragging a curve, and at the same time, hold the Option key. Once the new point has been created, you can modify it or the curve around it using the 2 previous methods.
|
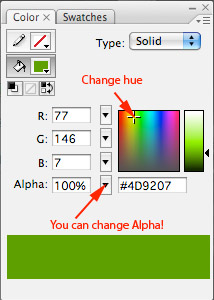
USING THE COLOR PALETTE |
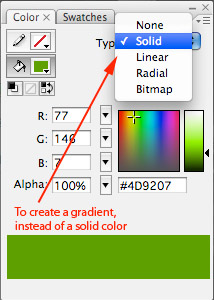
CREATING GRADIENTS |
SAVING A COLOR |
||||
 |
 |
 |
||||
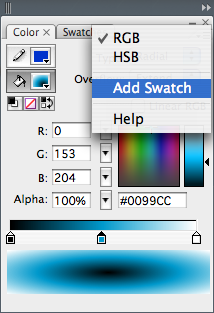
Besides the "Web safe color palette" you can create your own colors, using the color palette. In the picture, we are creating a new color to be used as a fill We are also defining a solid color |
Changing the "color-Type", will let you create a gradient. Gradients can be Linear or Radial and you can define all the colors you want within a gradient. Remember that the more colors you use, the bigger the file will become. Gradients with many colors can also delay flash when animated. |
Once your gradient OR solid color have been created, you can save it in your document's palette by clicking on the upper-right menu. To save the color, choose "Add Swatch" with the color selected. Once saved, it will show up in the color palette, underneath all the web-safe colors and after the default gradients. |
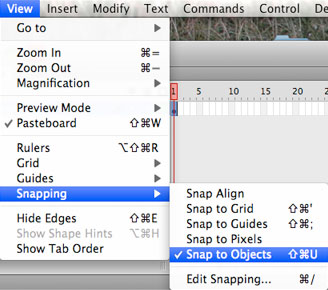
The snapping feature acts like If you want to close simple shapes easily you should draw with On the contrary, if you are tracing a complicated image, toggle it off. |
 |
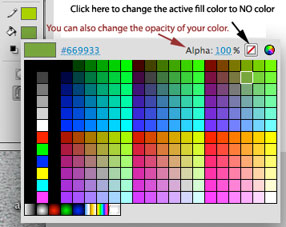
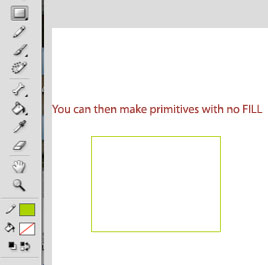
The bottom PENCIL and BUCKET icons stand by the active color for each one of them. You will click on the color rectangle to choose and active color for the LINE (pencil icon) You can even set each one of them to No Color, to draw a PRIMITIVE (with the rectangle icon, look at the selected tool on the pic on your right) with no like or no fill. |
 |
 |
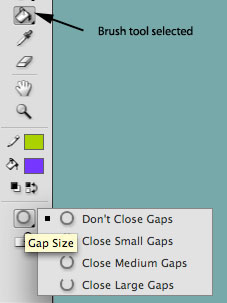
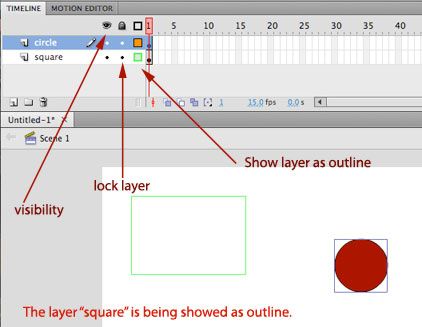
The Brush tool is used to fill a CLOSED shape with color. You might think that your shaped is closed when it actually contains a gap. Changing the visibility of the layer into an outline will help you finding the gap if your line was very thick. You can also use the GAP SIZE option menu and change the gap to medium or large gaps. |
 |
 |