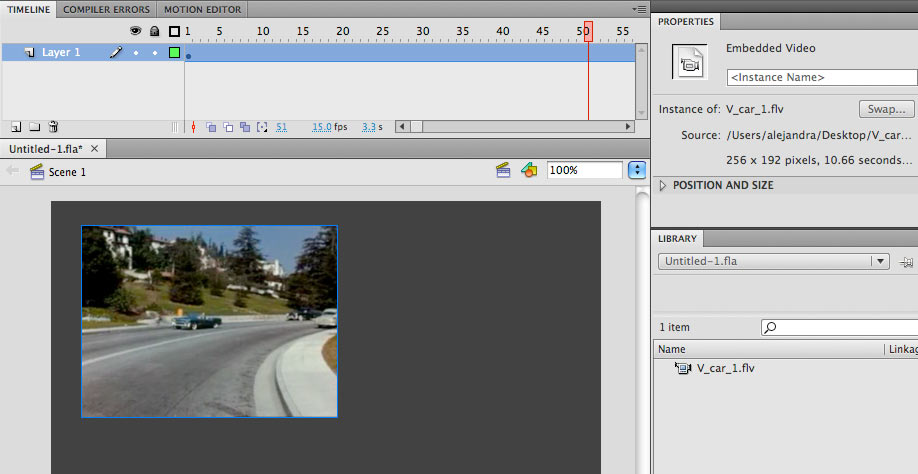
To EMBED a video file in your Flash project,
and see it playing in your timeline.
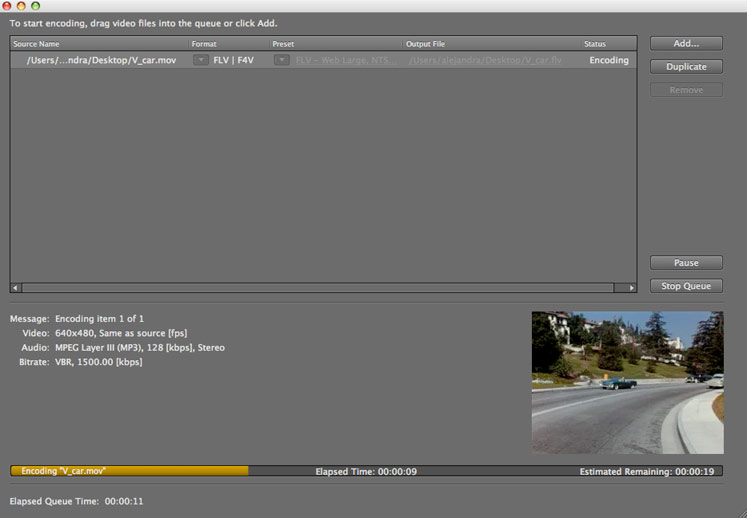
First compress it as an flv with the Adobe Media encoder application (AME).
You will find the application in the same folder than your Flash application.
First thing is to import your file, then select the settings, then compress the movie.
There are multiple pre-made settings to compress a video and still, there are more parameters you can set by hand.
If you are planning to embed the video, select:
FLV/F4V as a Format,
An FLV Preset (medium or large).
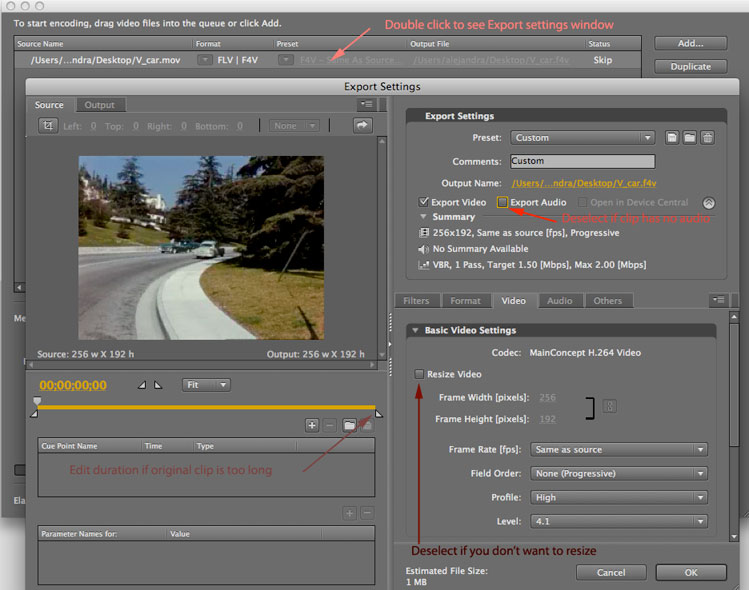
After you choose a Preset, you can still go to the Export Settings window and customize even more.
Double click on your Preset to open the window (see snapshot).
Remember that the audio of an embedded video tends to get out of sync, specially if the video is long.
Your video should be 5-8 seconds max.
You can edit the length here if it is longer than that.
If your video has a width/height duration different than what your chosen Preset, unclick the RESIZE VIDEO button.
You can see the info about the original size of your video on the lower left area of the video window (see snapshot).
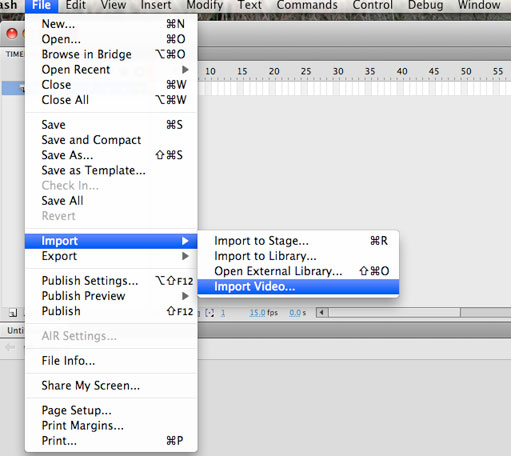
Import the flv to your Flash project.
Select FILE>Import>Import video.
Then follow the dialog window to IMPORT your video into Flash.
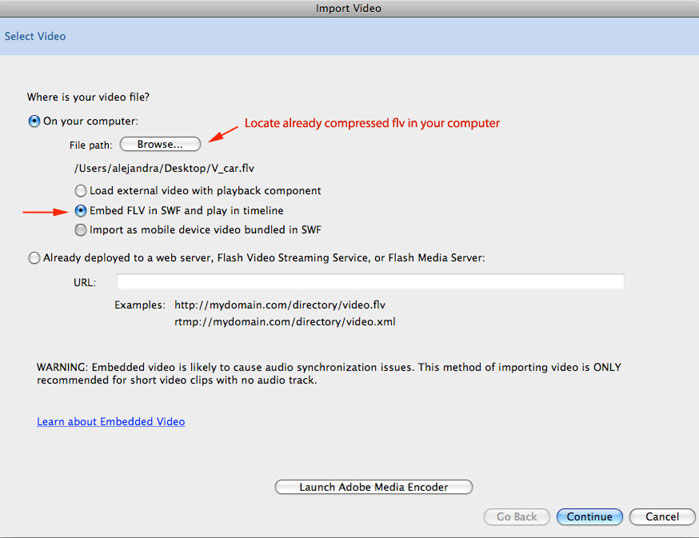
When you import your video to embed it in your fla file, check the box that says
"Embed FLV in swf and play in timeline".
You cannot use SKINS when you embed a video in Flash.
You can combine the video with animation because you will see EVERY frame of the video in the Timeline.
The video is attached to a keyframe and you can view each frame of it by moving Flash' playhead.
You can also place the video INSIDE a movieclip Symbol, and take advantage of the color changes that you can apply to such a symbol!
You can reuse the video several times on Stage as a symbol and you will not add file size, although it might play a bit slower.
If you really need to have sound in sync with the video, Import it independently as an audio file (mp3 format).
Lay it out on a layer with the video, and set the audio to Stream as a sync mode.
Ideally both layers should be inside a movieclip, so they don't take too much space on the Main Timeline.
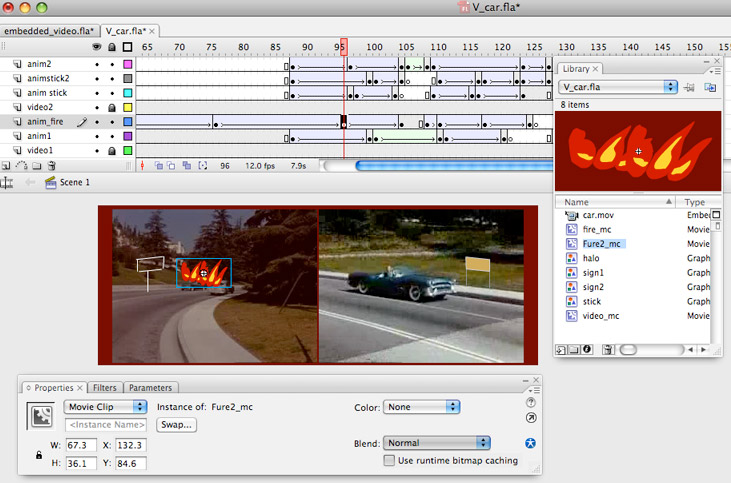
You can produce a Flash Animation "on top" of a video file.
You will only see the content of the video on Stage IF YOU EMBEDDED your video file.
LOCK the layer that contains the video, to make sure that you don't draw anything on that layer.
Create layers on top of the video using your favorite techniques.
Frame by frame will be the easiest because of the strict/fast Timing of the video but you can also use motion tweens, Shape-Tweens, guides, masks... you name it.
Make use of Library symbols to keep the file size small.
You can also "ATTACH" a video file to your fla project.
First compress it with the Adobe Media encoder application (AME).
You can choose to compress it as an FLV or an F4v file.
Those are different codecs. If you choose F4V, you will have to use the latest player.
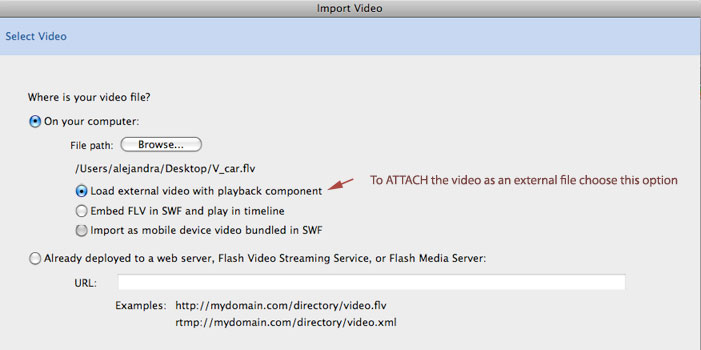
You need to make sure than the FLV video-files are placed on the same location in the computer than your FLA project-file and your swf.
When you take your files to the server, you will take the swf AND the FLV/F4V files, because they remain being EXTERNAL files, and they are not part of your project.
The best way is to place them all inside a folder on your desktop.

Then you will "import" the FLV file into your fla-project.
(What you are really doing is "importing an alias", to let flash know where the flv file is located.
That is why you cannot see the content of the movie inside Flash).
When you import your video to ATTACH it to the fla file, check the box that says
"Load external video with playback component" .
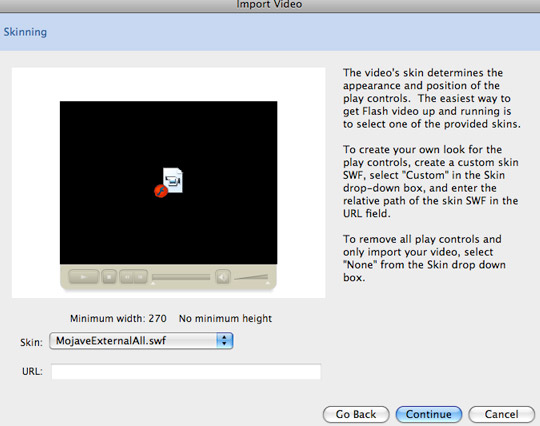
When you click Continue you will be able to choose a SKIN.
When you import an FLV into Flash, you can set up the SKIN for that movie.
By choosing a SKIN, you are using a pre-made look for your video-controls.
The skin is made of pre-made symbols, and will get stored in an independent swf file.
(You will have to copy that file to the server, together with your project swf file and the video-flv file.
Skins can be modified and customized, by using a different type of ActionScripting, called COMPONENTS.
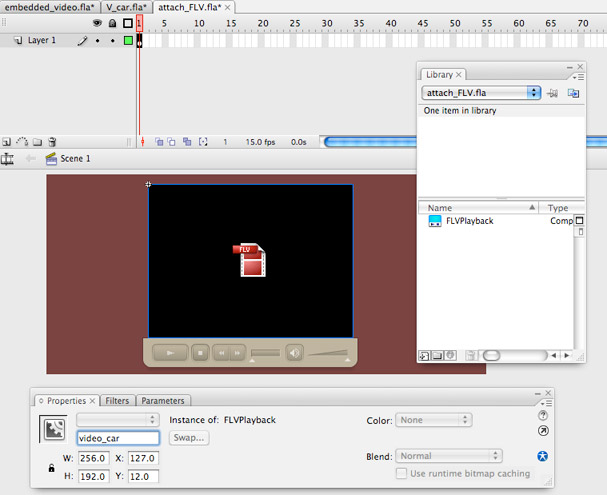
FLV movies CANNOT BE watched in the authoring environment.
They are covered by a black rectangle (defining their size) with the flv logo.
You CAN see the skin navigation, though.
They are always called FLV playback on the Library.
To keep track of them, name them immediately in the Properties panel ( I named mine "video_car").
FLV files only take one frame (Like movieclip-symbols!).
Make a stop action in an Actions layer so it can play freely and you can better control the Navigation.
FLVs and Components are better covered in the FLASH_VIDEO class, MAT_128, that is only currently offered Face to face.
For more information on Flash-video check out the book:
Flash CS3 Professional Video
STUDIO techniques.
By Robert Reinhardt, 2008.
Adobe Press. INBN 10: 0-321-48037-6