Those are the crucial concepts in the Production of a Pull Down Menu:
1. Each main Menu is organized INSIDE a movieclip symbol.
On frame 1 of each movie-clip there is only one visual element:
a button with the name of the Menu-item .
2. When we rollOver the name of the menu we want to SEE the submenu list.
We cannot structure this content INSIDE a button (the classical way until now) because once we see the list, we want to be able to choose among that list our preferred subMenu item (the one we really want to click on).
When we click-on the chosen subMenu item is when we really access the content.
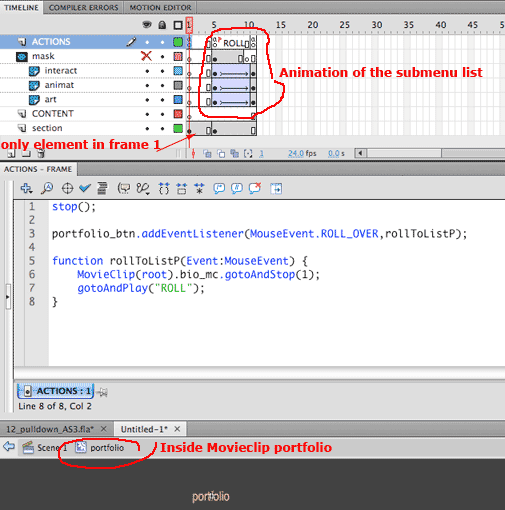
3. See how we create the sub-menu list as a column of active buttons.
I have created a frame-label(ROLL) and scripted the section-button to gotoAndPlay to the ROLL framelabel.
The list of submenus appears on Stage as an animation, from the ROLL frame label, to the next stop.
You should make this animation no longer than 10 frames, so users don't have to be waiting to be able to click.
Each subMenu button is placed on an independent layer, all layers under a mask, so you don't see them underneath the Menu text).
You can make the submenu list appear with any other effect you want,
(Fade in, coming from a side, appearning down-up...).
In the image on the right, each one of the subsection buttons (art, animation and interactive) are already scripted to gotoAnd Stop further along in the timeline, but the timeline hasn't still been created.
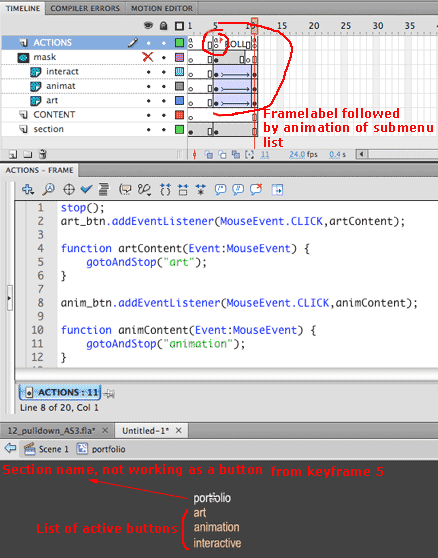
4. Once you get to the final frame of the animation you set a stop-action so the user can choose the subMenu item by clicking on one of the buttons.
If you press on a subsection button on the Stage,
the code will tell the playhead in the Timeline to move to the framelabel of the same name.You will place the content in a keyframe under that frame number.
(Use gotoAndStop "framelabel" in the code)
5. This construction, with all the menu content within 1 movieclip symbol, allows us to be able to Hide all content by coming back to frame 1 when a different pulldown menu is called (in your file that would be Contact or Bio).
To track when exactly the user is abandoning this menu and approaching another we can choose among 2 different tracking devices:
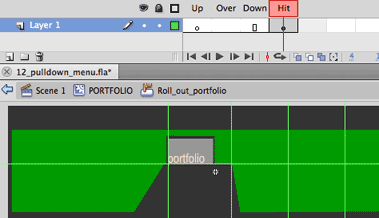
The first one is a "visual device": a button that detects when the user is getting close to any other menu (see the transparent button placed around the word portfolio on Stage. It is placed on the layer "transp_button,under the framelabel ROLL).
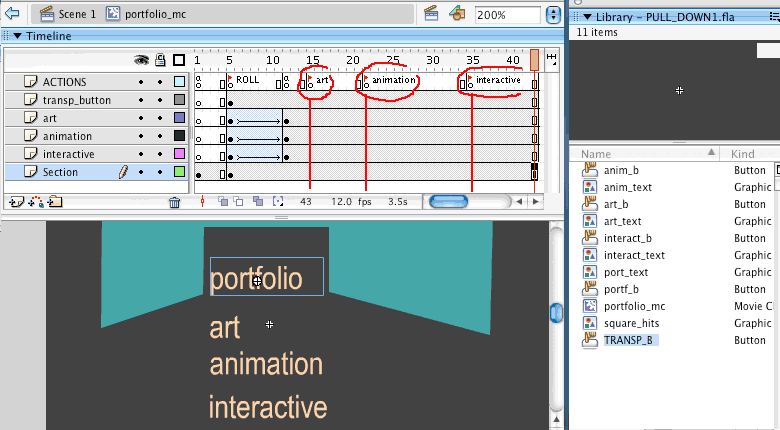
Using a totally transparent button (with no Up, Over or Down content), I have graphically defined the "rollOut area" for the section, by drawing it on the HIT area of the button.
What I define on the HIT are a of this transparent button is the area around my section name and getting closer to the other main section names (contact and Bio).
When the user steps into that area (technically rolling out of our whole section), we want the whole content to disappear by taking the playback head back to frame 1.
When the user does rollOver on that area, the script on the transparent button makes the movieclip's play-head comes back to frame 1 and the content disappears altogether to make room for another section's content on the Stage.
NOTICE that I am using the Hit-area of a button to define "a trap" that informs about the rollOut from our menu.
You will have to tweak this area when you test the interface-Use, so the hidden button takes you Out of the section when the user really abandons your section's content. You will have to test and correct the shape of the button.
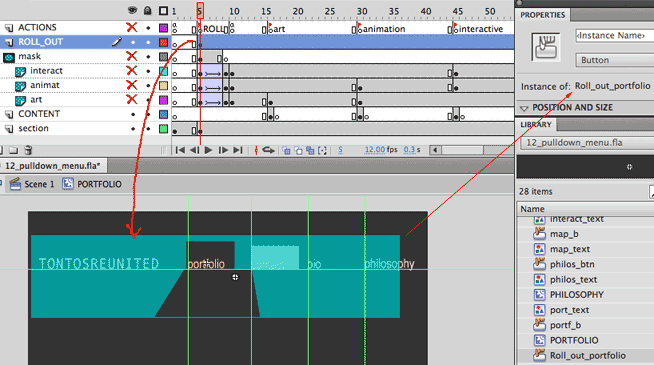
The second way of tracking the user appraching a different section would be through action Scripting.
You will have to add to the function for each Section button a some lines of code, naming each section-movieclip and making it go back to frame 1.
If you add this script to each section-button, you don't need to use the "transparent button trick" seen above.
You will need to name every Section-movieclip. So you can reference it on the code.
Notice that the programming for each section-button is placed INSIDE the section-movieclip.
Lets imagine that you have named your sections in the Properties panel:
portfolio_mc
bio_mc
As you see, you are asking the portfolio button INSIDE the portfolio movie-clip, to tell the Main Timeline to look for all those movieclips existing in the Main Timeline, and tell them to modify their displayed frame inside their own timelines, to make sure that everybody is in frame 1 BEFORE our movieclip displays its content.
| Script attached for the portfolio button, inside the portfolio_mc movieclip |
portfolio_btn.addEventListener(MouseEvent.ROLL_OVER,rollToListP); function rollToListP(Event:MouseEvent) {
|