It is not too late for some of you to experiment more and try more creative layouts and be more daring!
Look at other layouts; brochures, magazines, posters. Anything to give you more creative ideas.
Check out http://issuu.com to see some really great design.
Solid red line indicates a bleed. A bleed line is needed if images or art butts up to edge of the design trim line.
Set bleed lines in Document setup.
All images to bleed, MUST extend .25" (18pts) BEYOND the set bleed line in order for it to print as a bleed.
Open your file in Indesign
go to FILE>Document setup> select more options and the BLEED and SLUG boxes are now visible.
In the BLEED box type in 0.125" (9 pt) and click the link icon at the end of the row and it will fill the other boxes.
You now have a white page added to accommodate the bleed line (red line) behind your brochure.
They DO NOT touch the trim line.
If they are placed inside the brochure along the fold, they will print.
If more than 3 panels, reduce additional panels 1p each time it folds in.
Names and addresses will be added using a database sent to the printer by the client or you the designer.
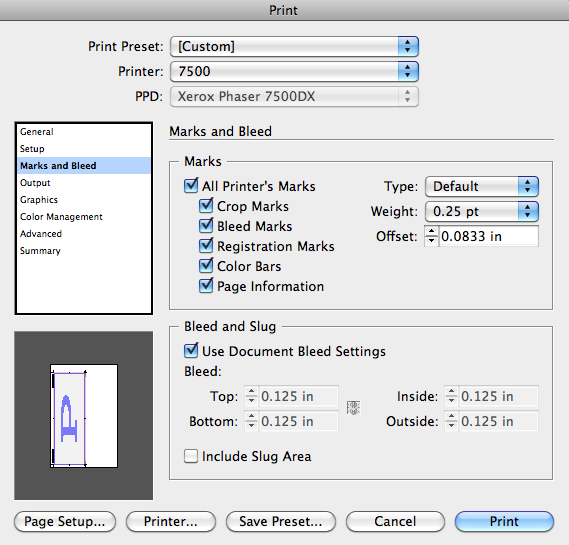
The graphic below shows all the boxes that need to be selected.
When exporting to PDF be sure to select the Marks and Bleed option (same as in Indesign)
before you save.
