
The Post Office: Mailing your Brochure
Size does matter!
An over-sized brochure will cost your client more to mail than a standard Post Office size.
The client expects the designer to beware of mailing issues and if there is a problem,
you, the designer, will be financially responsible.....and there goes your profit!!
Always check the USPS website BEFORE you begin designing.
• US Post Office Mailing Info
• Important facts about designing a self mailer
The Indicia (instead of a stamp)
Indicia are markings on a mail piece showing that postage has been paid by the sender.
Please keep these requirements in mind when designing your Permit Imprint Indicia.
For illustrations, visit Business Mail 101.
Do:
Do include these required elements of a Permit Imprint Indicia, including:
Line 1: Rate Marking.
Line 2: The words “US Postage Paid.”
Line 3: City and state where permit is held.
Line 4: The words “Permit No.” and your permit number.
Don’t:
Don’t forget to check that you included critical elements into your Permit Imprint Indicia.
• It must show your city, state and permit number.
• It may be only four or five lines long.
• It must appear to the upper right of the delivery address.
Choosing the Paper
What about choosing paper for a brochure?
Choosing the most appropriate quality paper for your project can be a daunting task. Paper has many features to consider and new sheets are continually coming into the market. How to decide?
Here's 10 tips for choosing the right paper for your job.
When choosing paper for any print job, it's important to remember that the color of the paper will affect any color photos you use in your design. Photos become halftones when they ar printed. A halftone is made up of dots and in between those dots the paper shows through.
White paper is usually best unless you are using graphics and type with Pantone spot colors.
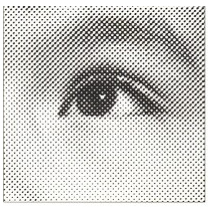
Halftone image
The Printing Part
Bleeds
"Bleed" is a printing term used to indicate the area with a background image that will be trimmed off after the file is printed and cut down to the finished size. Since the bleed area will be trimmed off during the cutting process, there should be no text or other important information in the bleed area.
Projects that make use of image bleed should extend any bleeding background and/or images 1/8" over the final paper trim edge. We also recommend all other text and graphics stay inside a "Safe Zone" printing area which stays inside the final paper trim edge by about 1/4". This ensures a more professional appearance and eliminates any risk of type or images being accidentally "nicked" during trimming.

This is a single card set up with proper bleeds. Also shown here is a 'safety margin'. Again, regarding the possibility of slight shifts during cutting, it is wise to keep important elements (text, logo, etc.) away from the edges of the finished card. This is also an aesthetic decision, much like text in a book, where a margin around the edges usually helps with readability. However, you are obviously at liberty to design according to your tastes.
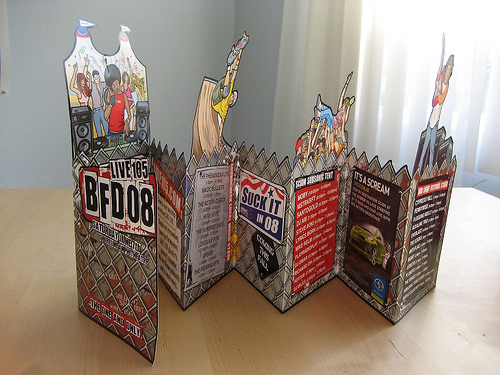
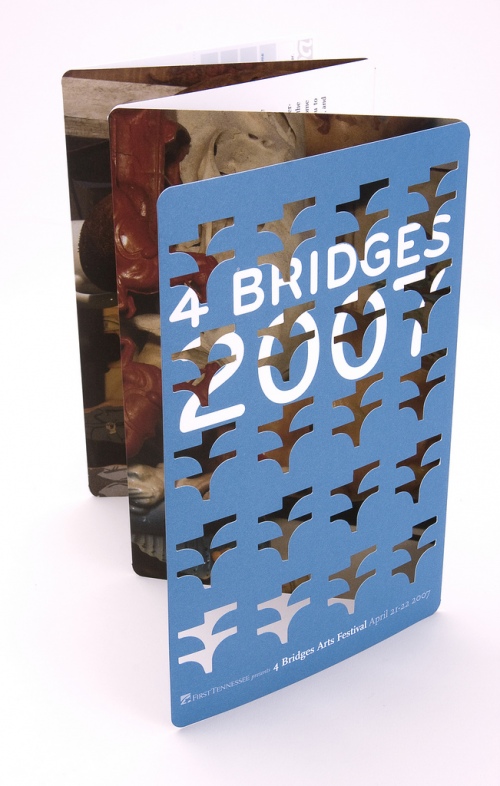
What is Die-Cutting
Die-cutting is a printing process where you cut an object out of a sheet of paper using a steel rule die.
Die Cutting is applied after a square or rectangular sheet is printed on a press. It is then taken to one of multiple die cutters and the figure is die cut out of the sheet. To do this it requires a steel rule die that has two types of steel rules. One is a cutting rule that is sharp enough to cut through the paper and one is a scoring rule that is rounded at the top of the rule so it will crease the paper to enable easy, accurate folds.
After die cutting, you must scrap the die cut piece out of the remainder of the sheet. The die cut part is held in the sheet with nicks that are put in the die. This is needed so the piece does not fall out in the press.
It is pretty rare for a printer to have the capability of die cutting in house. Most printers will send out all die cutting.
In a time when every cent that is spent on marketing counts, standing out from the crowd matters. Creating eye-catching brochures can be taken to the next level by adding dimension to your brochure designs with die cuts.
|